How-To · Home Maintenance
How to Unclog a Slow Drain Without Harsh Chemicals
Chemical drain cleaners corrode pipes, harm waterways, and often don’t even work. Here’s what actually does.
A slow drain is one of those small domestic annoyances that gets quietly worse until it demands your full attention — usually when you’re standing ankle-deep in shower water on a Monday morning. The instinct is to reach for a bottle of chemical drain cleaner, pour it in, and hope. But those products are corrosive to older pipes, toxic to the water system, and frequently ineffective on the kind of organic buildup — hair, soap scum, grease — that causes most residential drain clogs. Learning how to unclog a slow drain without harsh chemicals isn’t just the safer choice, it’s almost always the faster one too.
The good news is that the vast majority of slow drains in bathrooms and kitchens can be cleared in under an hour using tools you likely already have, or can pick up for a few dollars. This guide walks through the methods in order of effort — start simple, escalate only if needed. Most clogs surrender well before you reach the final step.
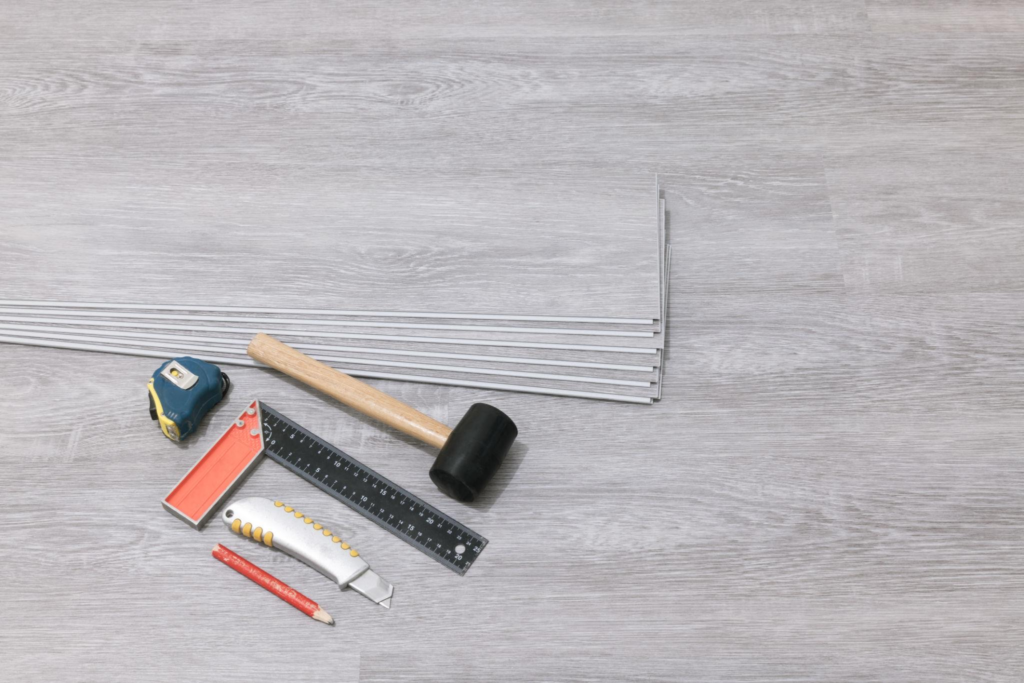
What You’ll Need
Tools
- Drain snake or zip-it tool
- Cup plunger (not a flange plunger)
- Adjustable wrench or slip-joint pliers
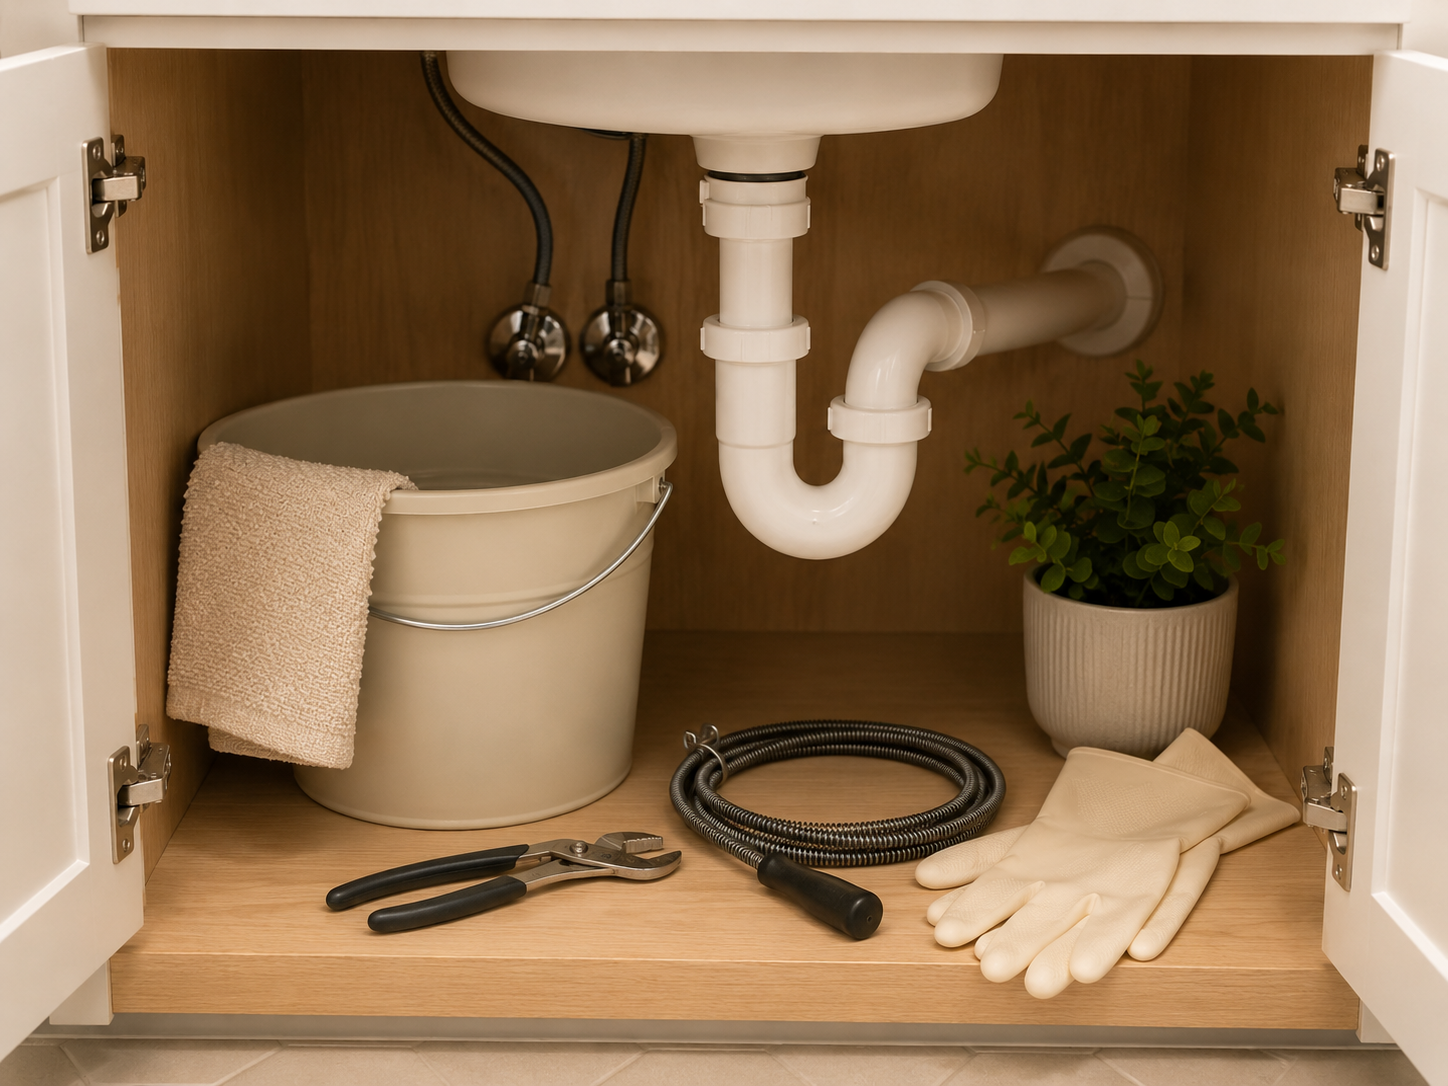
- Bucket
- Old toothbrush
- Rubber gloves
Supplies
- Baking soda
- White vinegar
- Dish soap
- Boiling water (kettle)
- Drain catch / hair catcher (for prevention)
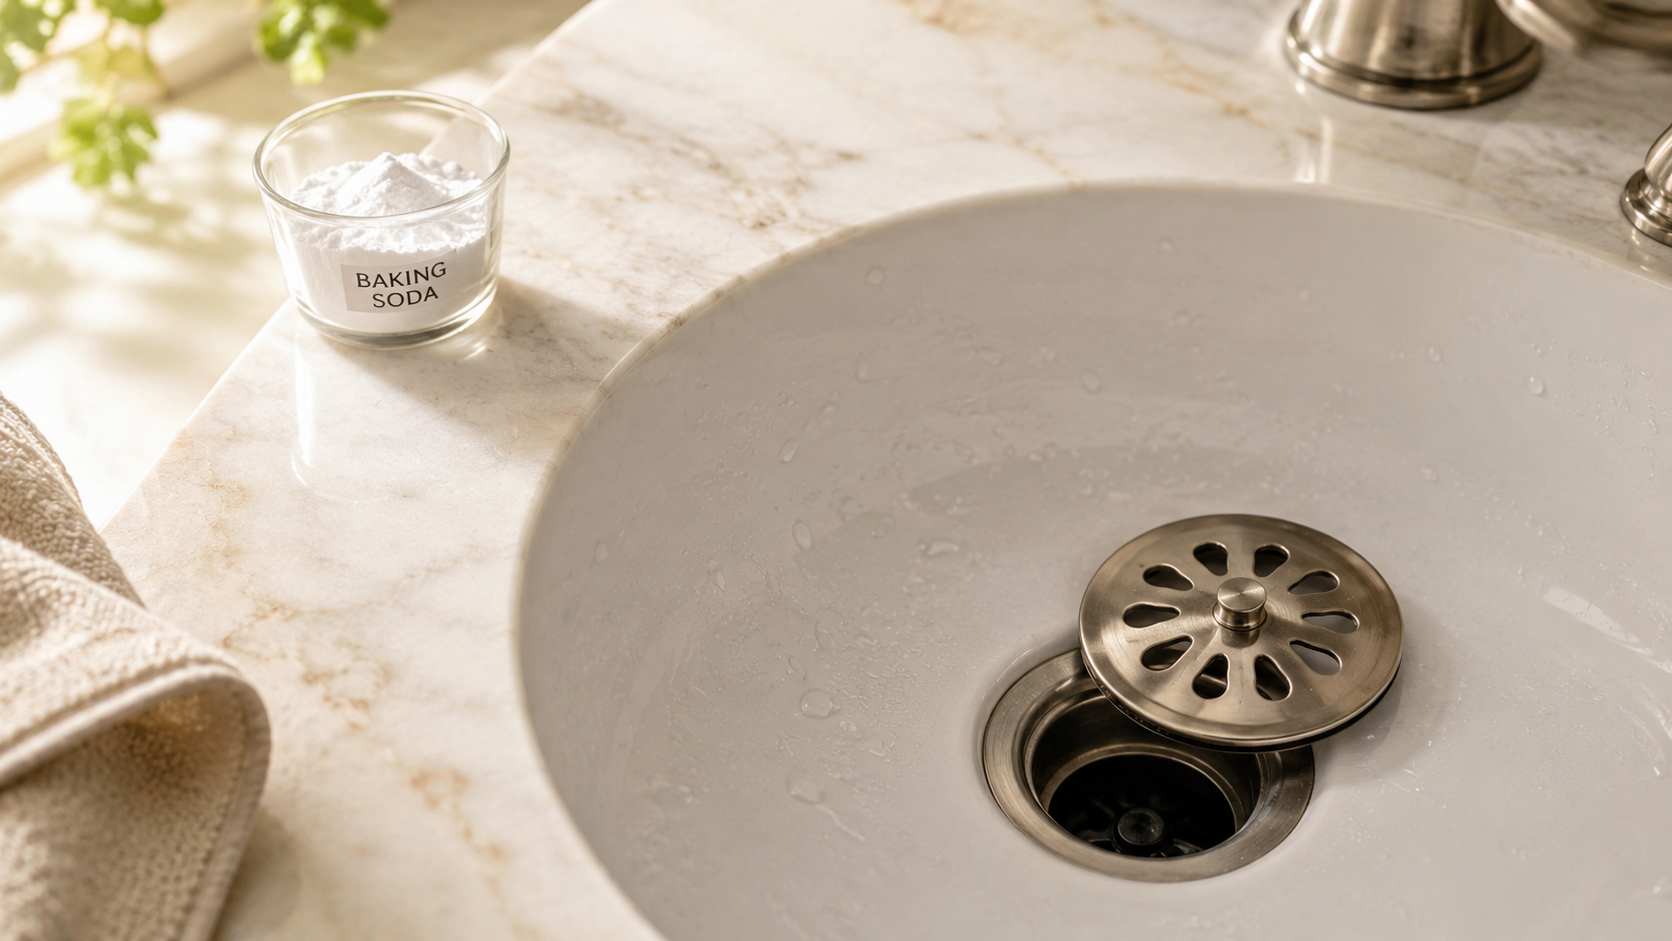
Before anything else, get your gloves on and remove the drain stopper or cover — most unscrew or lift out, though some have a small screw underneath. Look inside with a flashlight. In bathroom drains, the culprit is almost always a dense mat of hair and soap residue sitting just below the opening. Use your fingers, a zip-it tool, or a bent wire to pull it out rather than push it further down. You may be surprised — and disgusted — by how much comes out, and how immediately the drain improves.
For kitchen drains especially, a full kettle of just-boiled water is often enough to clear the issue on its own. Grease and cooking residue solidify on pipe walls at room temperature and soften with heat. Pour the water slowly in two or three stages — about a third of the kettle at a time — giving it thirty seconds between pours to work through the pipe. Do not use boiling water on PVC pipes that may be brittle or damaged; very hot tap water (not boiling) is a safer choice in older homes where pipe condition is uncertain.
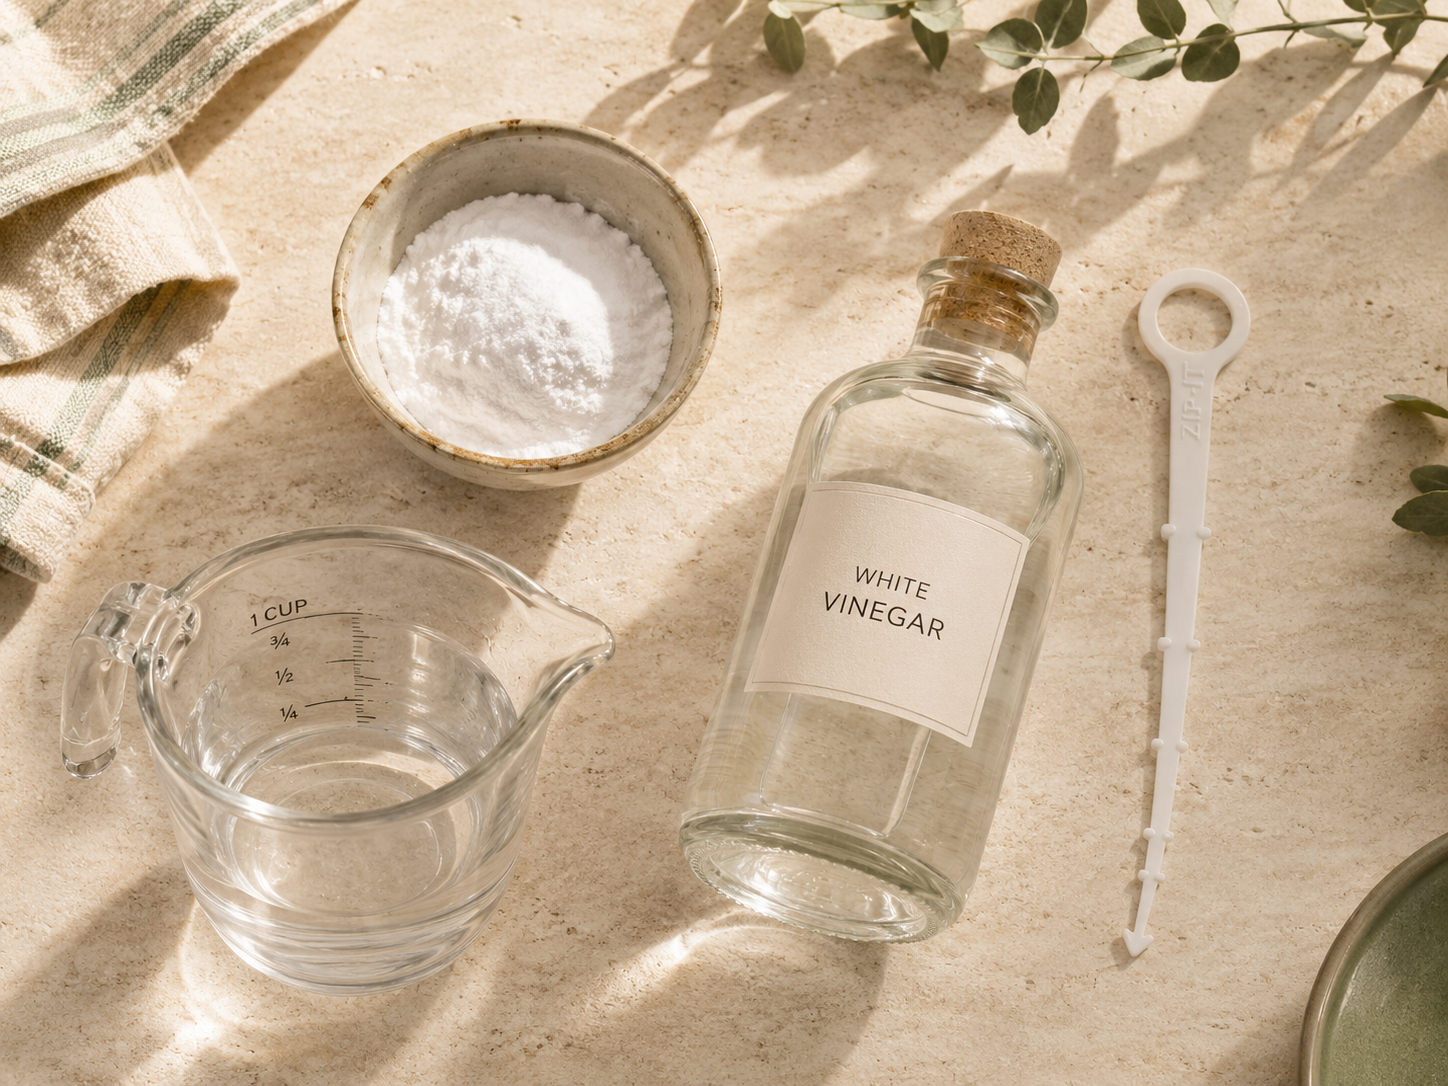
This is the most effective chemical-free method for grease, soap, and light organic buildup. Start by pouring one cup of baking soda directly down the drain, followed immediately by one cup of white vinegar. The reaction creates a fizzing action that loosens buildup from pipe walls. Cover the drain opening with a cloth or drain plug to direct the pressure downward rather than out. Let it sit for a full twenty to thirty minutes, then flush with a kettle of hot water. For stubborn drains, repeat once before moving to mechanical methods.
If the flush method doesn’t resolve the slow drainage, it’s time to go mechanical. Insert the drain snake or zip-it tool into the opening and push it slowly downward, rotating as you go. The goal is to hook or break up whatever is lodged further down — not to push it deeper. Once you feel resistance, rotate the tool a few times and then pull it back out steadily. Remove whatever comes with it. Repeat two or three times until the tool comes back clean. Run hot water to check improvement before continuing.
Plunging works through suction and pressure rather than physical contact with the clog, making it useful for blockages that sit further down the pipe. You’ll need a cup plunger — the flat-bottomed type — not the flange plunger designed for toilets. Fill the sink or tub with an inch or two of water so the plunger forms a proper seal over the drain. If there’s an overflow opening (the small hole near the top of a bathroom sink), seal it firmly with a wet cloth or your hand to keep the pressure directed at the clog. Pump the plunger firmly ten to fifteen times, then lift sharply. Repeat until water drains freely.
If steps one through five haven’t resolved the issue, the blockage is likely sitting inside the P-trap — the curved section of pipe directly under the sink. Place a bucket underneath it before you start; there will be water. The P-trap typically unscrews by hand or with slip-joint pliers — look for the two plastic slip-joint nuts on either end of the curved section. Remove the trap and examine it. Debris, grease, and small objects (jewellery, toothpaste caps) accumulate here regularly. Clear it out, rinse the trap under a running tap, scrub with an old toothbrush, and reinstall. Hand-tighten the slip-joint nuts — no wrench needed for PVC — and test for leaks by running water for a full minute.
Run hot water at full pressure for at least two minutes. Watch for any dripping at the P-trap connections and ensure the drain is flowing at normal speed. If water moves freely and there are no leaks, you’re done. If the drain is improved but still slower than it should be, it may be worth repeating the baking soda flush as a follow-up treatment to clear residual buildup from the pipe walls.
A few small habits eliminate most future drain clogs before they start. Fit a fine-mesh drain catcher or hair trap on every bathroom drain — they cost almost nothing and do most of the work. In the kitchen, never pour cooking grease or oil down the sink; let it cool and dispose of it in the bin. Run a full kettle of boiling water down kitchen drains once a month to prevent grease buildup. And when the shower drain starts running a little slower than usual, that’s the right time to reach for the zip-it tool — not after you’ve already got a standing puddle.
The question of when to call a plumber is worth answering directly. If you’ve worked through every step in this guide and the drain remains blocked, or if you notice gurgling sounds from other fixtures when water drains (a sign of a deeper shared-line blockage), or if multiple drains in the home are slow at the same time, stop and call a licensed plumber. The same applies if you see water backing up into a tub or sink from another fixture, or if you notice any sewage odour — these are signs of a mainline issue that no amount of DIY snaking will fix. Attempting to push further in those scenarios risks making the problem significantly worse.
Most residential drain clogs, though, are exactly what they look like: organic matter that’s had time to accumulate. The methods in this guide are what plumbers use before escalating to anything more involved. They work because they address the actual cause rather than just masking it — and they leave your pipes, your pipes’ seals, and the water in your municipality’s system exactly as you found them.
A Word to Take With You
“
The fix is rarely complicated.
It only feels that way because we waited
too long to look.