How to Install Hardwood Floors: A Complete DIY Guide for Beginners
There is something deeply satisfying about walking barefoot across a floor you installed yourself. Hardwood brings warmth into a room the way no tile or carpet ever quite can — the grain, the glow, the quiet creak under a familiar footstep. If you have been thinking about how to install hardwood floors in your own home, this guide will walk you through every step, from choosing your boards to the final trim piece, in plain, confident language that any beginner can follow.
Learning how to install hardwood floors is one of the most rewarding home upgrades you can tackle on a weekend. The result is a space that feels noticeably more refined, more personal, and more alive than when you started. And unlike many renovations, DIY hardwood floor installation is genuinely achievable — you do not need to be a contractor or own a workshop full of specialist tools.
Why Hardwood Flooring Is Worth Every Effort
Before we get into the how-to, let's take a moment to appreciate the why. Installing hardwood floors transforms a room in a way that is hard to put into words until you experience it. Hardwood flooring brings an organic warmth to living rooms, hallways, bedrooms, and dining areas that synthetic materials simply cannot replicate. The natural grain, the slight variation in color from plank to plank — it gives a home genuine character.
Beyond beauty, hardwood is one of the most durable flooring surfaces you can install. A well-laid solid hardwood floor can last decades. It can be sanded and refinished multiple times, so even after years of family life — pets, spills, moving furniture — it can be brought back to looking brand new. That kind of longevity makes the weekend you spend on installing hardwood flooring yourself feel especially worthwhile.
A hardwood floor is not just a surface — it is the foundation of how a room feels. Once you install one yourself, you will look at that floor differently every single day.
Choosing Your Hardwood: Solid vs. Engineered
The first real decision in any hardwood floor installation project is choosing between solid and engineered hardwood. Both are genuine wood. Both look beautiful. The difference lies in how they are made and where they can be installed.
Solid Hardwood
One piece of wood, top to bottom. Thicker (¾ inch), incredibly durable, and can be refinished 4–6 times. Ideal for above-ground level on plywood subfloors.
Engineered Hardwood
Real wood veneer on a plywood core. More dimensionally stable in humid conditions. Works over concrete and is ideal for basements or slab-on-grade homes.
Pre-Finished Boards
Comes with the finish already applied. No sanding or staining on-site. Saves significant time and eliminates fumes during installation — perfect for a first DIY project.
For most beginners tackling a living room, bedroom, or hallway on an above-ground plywood subfloor, solid pre-finished hardwood is the most satisfying choice. It is robust, widely available, and requires no finishing work after the boards are laid.
The Three Installation Methods — Nail-Down, Glue-Down & Click-Lock
Understanding the three main hardwood flooring installation methods will help you choose the right approach for your subfloor type and skill level.
| Method | Best For | Skill Level | Key Tool Needed |
|---|---|---|---|
| Nail-Down | Solid hardwood on plywood subfloor | Beginner–Intermediate | Flooring nailer / mallet |
| Glue-Down | Engineered or 5/16" solid on concrete | Intermediate | Flooring adhesive & trowel |
| Click-Lock (Floating) | Engineered hardwood, any subfloor type | Beginner | Rubber mallet & pull bar |
The nail-down hardwood floor installation method is the most common for solid wood and produces the firmest, most traditional result. If you rent a pneumatic flooring nailer (available at most hardware stores for around $45–$65/day), the process is surprisingly fast once you get into a rhythm.
Tools & Materials You Will Need
Good preparation separates a smooth DIY hardwood flooring installation from a frustrating one. Gather these tools before your project day — having everything on hand keeps momentum going and prevents mid-project hardware store runs.
- Flooring nailer or stapler — rent or buy; essential for nail-down method
- Rubber mallet — taps boards together gently without damaging edges
- Tapping block — protects tongue during assembly
- Pull bar — for seating boards near walls
- Circular saw or miter saw — crosscuts planks to length
- Table saw or track saw — rips planks to width for edges
- Chalk line & chalk — snaps a perfectly straight starter line
- Tape measure & carpenter's square
- Moisture meter — tests subfloor & wood moisture levels (critical)
- Pry bar & hammer — for removing baseboards
- Knee pads — you will thank yourself on day two
- Safety glasses & hearing protection
- Underlayment / felt paper — sound dampening & moisture barrier
- ¼-inch spacers — maintains expansion gap along walls
How to Install Hardwood Floors: Step-by-Step
Follow these eight steps and your hardwood floor installation will go smoothly from the first plank to the last trim nail. Take your time on the prep work — the steps before you touch a board are often what determines the long-term result.
Acclimate Your Hardwood Boards
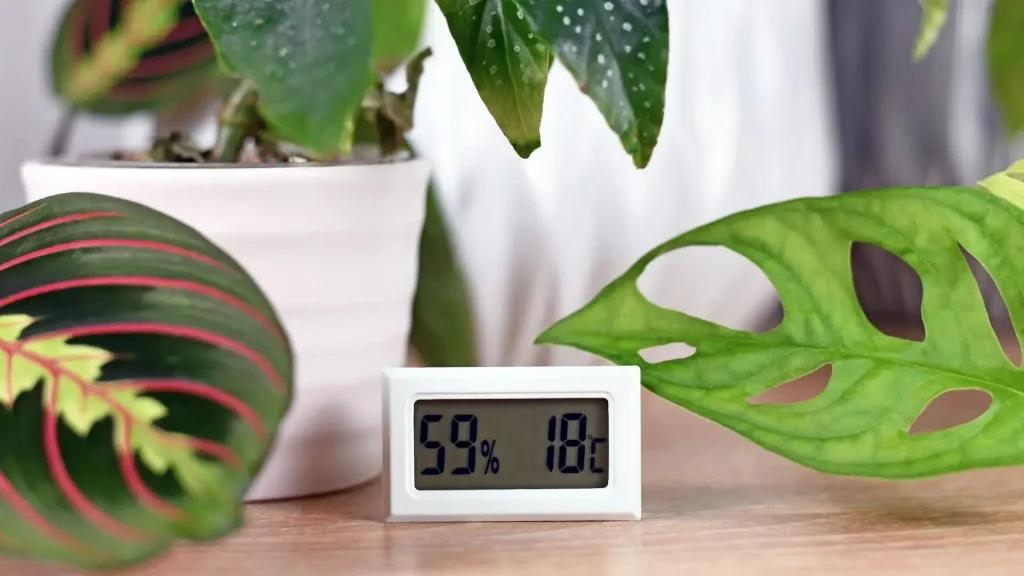
Stack your unopened boxes of hardwood in the room where they will be installed and leave them for at least 48–72 hours (some species and thicknesses need up to a week). Keep the room at its normal living temperature and humidity. This allows the wood cells to expand or contract to match the environment, which prevents buckling, gapping, or warping after installation. Never rush this step — it is the single most common cause of hardwood floor failures.
Prepare and Inspect Your Subfloor
Remove baseboards carefully (label them to re-use). Check your subfloor for high spots and low spots — it must be flat within 3/16 inch over a 10-foot span. Sand down high spots and fill low spots with a floor leveling compound. Test for moisture: subfloor moisture must be below 15%, and the hardwood boards should read within 5% of that number. If moisture is too high, pause and address the source before proceeding.
Lay Your Underlayment
Roll out 15-lb felt paper or foam underlayment perpendicular to the direction the boards will run. Overlap seams by 4 inches and secure with staples or tape. Underlayment provides a slight moisture buffer, dampens sound, and helps boards glide into place during installation. For concrete subfloors, use a dedicated vapor-retarder membrane instead.
Plan Your Layout Direction & Snap Your Starter Line
Run boards perpendicular to the floor joists for structural strength and the most visually pleasing result. Find the longest, straightest wall and measure out ½ inch from it (the expansion gap). Snap a chalk line at that point — this is your absolute reference. Before nailing anything, do a dry lay across the room to check how boards will land at the far wall. If the cut at the far wall would be less than 2 inches, shift your starting row to balance it out.
Install the First Two Rows
The first two rows are the most important in the entire project. Position the first board tongue-out, groove toward the wall, aligned to your chalk line. Face-nail (top-nail) the first row through the face of the board, as the flooring nailer cannot get close enough to the wall. Pre-drill to prevent splitting. Use spacers along the wall to maintain your expansion gap. Once two or three rows are down and secured, the flooring nailer can take over for all subsequent rows.
Nail Down the Body of the Floor
Work your way across the room, engaging the flooring nailer at an angle through the tongue of each board. Space nails every 6–10 inches along each plank, and always nail within 1–2 inches of end joints. Stagger the end joints between rows by at least 6 inches — never create an "H" pattern of aligned joints, which weakens the floor. Pull boards from multiple boxes as you work to blend color and grain variations naturally. Tap boards gently against the tongue (never the groove) to seat them snugly before nailing.
Measure, Rip-Cut & Install the Final Rows
As you approach the far wall, the flooring nailer will no longer fit. Measure the remaining gap carefully — walls are rarely perfectly parallel — and rip-cut your final boards to width on a table saw. Leave the ½-inch expansion gap on this side too. Use a pull bar to seat the last rows: hook it over the edge of the board and tap it with a mallet to lock the boards tightly together. Face-nail these final rows just as you did with the first rows.
Install Baseboards, Shoe Molding & Transition Strips
Remove your spacers and re-install the baseboards (or install new ones). The baseboard should sit just above the floor — it covers the expansion gap but does not restrict floor movement. Nail baseboard into the wall studs, never into the floor itself. Add quarter-round shoe molding if there is a visible gap below the baseboard. At doorways and transitions between rooms, install T-molding or reducer strips to bridge the height difference and cover the gap cleanly.
Common Beginner Mistakes to Avoid
Most problems with DIY hardwood floor installation trace back to a small number of preventable errors. Here is what to watch out for:
- Skipping acclimation — the leading cause of buckling and gapping after installation.
- Ignoring subfloor moisture — even a slightly wet subfloor will cause wood to warp over time.
- Not leaving an expansion gap — hardwood expands seasonally; a missing gap causes boards to buckle in summer.
- Running boards in the wrong direction — always perpendicular to joists for structural integrity.
- Skipping a dry layout — checking the layout across the room before nailing prevents ugly slivers at the far wall.
- Forgetting to stagger joints — rows with aligned end joints create structural weak spots and look unnatural.
- Nailing baseboard into the floor — this pins the floor down and prevents natural expansion movement.
- Buying too little wood — always order 10–15% extra for cuts and future repairs. Batch lots may not match later.
Caring for Your New Hardwood Floor
Once your hardwood flooring installation is complete and the trim is in place, a few habits will keep your floor looking stunning for years.
Sweep or dry mop regularly — grit and sand are the primary culprits of surface scratches on hardwood. A microfibre mop used a few times a week removes debris before it can work into the finish. For cleaning, use a pH-neutral hardwood floor cleaner; never use steam mops or excessive water on solid hardwood, as moisture penetrates the seams and causes swelling.
Place felt pads under furniture legs and use area rugs in high-traffic zones. Maintain your home's relative humidity between 35% and 55% year-round — this is the sweet spot for dimensional stability in any solid hardwood floor. A whole-home humidifier in dry winter months is one of the best investments you can make to protect your flooring long-term.
The maintenance ritual of a hardwood floor is simple and almost meditative — a dry mop, the grain catching the afternoon light, and the quiet satisfaction of a home that feels truly looked after.
Choosing the Right Wood Species for Your Home
Not all hardwood flooring is equal in hardness. The Janka hardness rating measures a wood's resistance to denting and everyday wear. For busy family homes with pets and children, choosing a harder species is a smart decision that pays off in long-term durability.
- Red Oak — Janka 1290. Classic, warm reddish-tan tones. The most widely available and affordable hardwood species in North America.
- White Oak — Janka 1360. Slightly harder with cooler, greyer undertones. Excellent for contemporary and Scandinavian-inspired interiors.
- Hard Maple — Janka 1450. Very light, nearly creamy in color. Ideal for modern, minimalist spaces but shows scratches more readily due to its pale tone.
- Hickory — Janka 1820. Dramatic grain variation, very hard, extremely durable. Great for rustic and farmhouse-style homes.
- Brazilian Cherry (Jatoba) — Janka 2350. Rich reddish-brown tones that deepen beautifully over time. Among the hardest flooring options available.
- Walnut — Janka 1010. Softer than oak but prized for its deep chocolate-brown color and fine grain. Luxurious in feel and appearance.
For most homes, white or red oak hardwood offers the best balance of durability, beauty, availability, and price — which is why they remain the most popular choices in North American residential hardwood floor installation year after year.
Your Home Deserves This Kind of Upgrade
At the end of the day, learning how to install hardwood floors is not really about the floor. It is about the feeling of standing in a room that you made more beautiful with your own hands. It is about the morning light catching the grain on a Sunday when the house is quiet. It is about the small, enduring pride that comes from improving the place where you live.
A hardwood floor installation DIY project asks for one full weekend, a bit of patience on the prep work, and the willingness to take your time on that first chalk line. What it gives back is a floor that will outlast decades of life in your home — one that grows more beautiful with each passing season.
Now is the perfect time. Pick your species, measure your room, order a little extra, and let those boards acclimate. Your home already knows what it wants to look like. You are about to give it exactly that.
Ready to Transform Your Space?
Share your finished floor in the comments below — we love seeing how these projects come together. If you found this how to install hardwood floors guide helpful, pass it along to a friend planning their own home upgrade.