How to Insulate Exposed Water Pipes for Winter in Canada
To insulate exposed water pipes before winter, start by identifying which runs are genuinely at risk — not just the ones you happen to see. Match insulation to each pipe’s real outside diameter and material using the product’s own sizing chart, not a guess at “pipe size.” Where a run needs heat cable, install and test the cable first, per its own instructions, before adding the insulation it calls for. Then winterize outdoor faucets according to their type: conventional sillcocks need an interior shutoff and a drained, open valve; frost-free faucets just need the hose removed and the handle closed. Done in that order, none of this requires guesswork.
Which Pipes Actually Need Protection
The safest way to check a home isn’t by asking which pipes are visible — it’s by ranking every run by how exposed it actually is to unheated air. A pipe inside a heated basement is usually low risk, because the surrounding air stays above freezing even when the furnace cycles down overnight. That’s one more reason a furnace that’s actually been serviced this fall matters to your plumbing. But “usually low risk” isn’t “no risk” — check anyway, especially anywhere a pipe runs close to a rim joist or an uninsulated exterior wall, since cold pockets exist even in rooms that read as warm.
The genuinely high-risk tiers are unheated crawl spaces, garages, and attics; any run against an uninsulated exterior wall; the last exposed stretch of pipe feeding each outdoor faucet; and, worth calling out on its own, any pipe that has frozen before. A property with a documented history of freezing is a different case from a first-time risk, and it’s worth treating it that way — the City of Guelph, for example, keeps a record of addresses with a history of frozen pipes and asks those specific properties to run a small amount of water through the winter — not every property in the city, just the ones with a known pattern.
It’s also worth knowing the scale of what’s at stake. When a severe cold snap hit British Columbia, Alberta, and Saskatchewan in January 2024, the Insurance Bureau of Canada reported more than $180 million in insured damage, with roughly 70 percent of the resulting claims involving personal property — the kind of loss that typically follows a burst pipe. It’s one data point, not a trend line, but it’s a useful reminder that this isn’t a hypothetical risk.
Materials, Sizing, and Real Canadian Costs
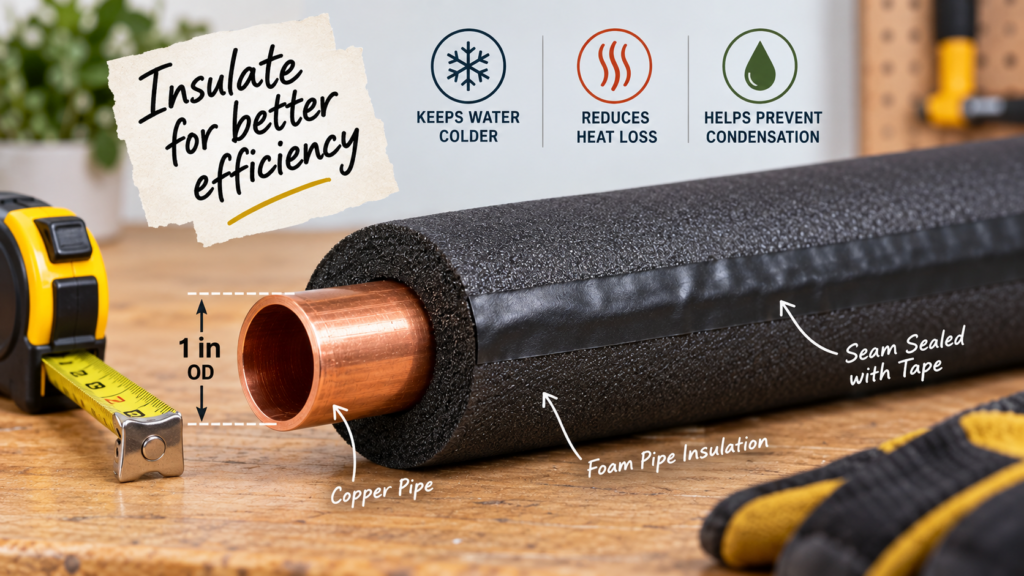
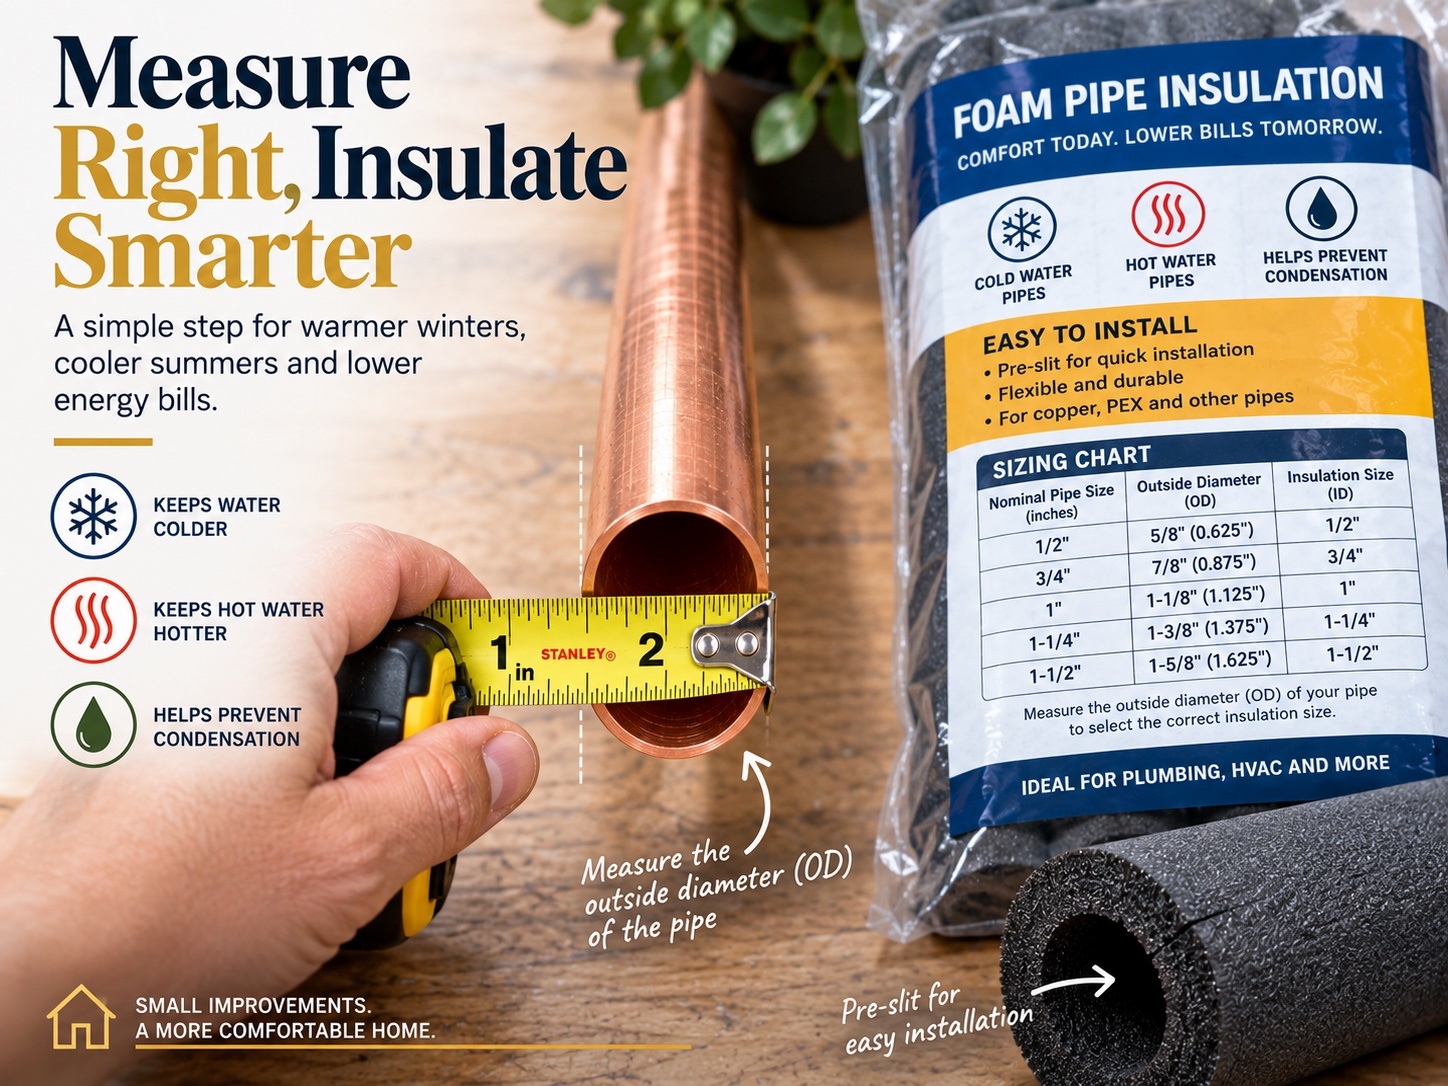
Insulation sizing works by outside diameter (OD), not by the pipe’s nominal size, and the two aren’t the same thing. A pipe sold as “1/2-inch copper” has an actual outside diameter closer to 5/8 inch; a “3/4-inch” pipe is closer to 7/8 inch. Every insulation product lists its own sizing chart by inside diameter (ID) matched to a pipe’s real OD and material — copper, PEX, CPVC, or iron — so check the chart rather than assuming the labelled pipe size tells you what to buy.
Here’s what that looks like with real, dated examples. As listed on Home Depot Canada in September 2026, Tundra’s self-seal foam pipe insulation comes in a 7/8-inch ID, 1/2-inch wall thickness, 6-foot length for common 3/4-inch copper runs, priced at roughly $5.48 each; the 1-3/8-inch ID version for 1-inch pipe runs about $5.78 for the same 6-foot length. On the heat cable side, WarmlyYours’ plug-in pipe heating cable kit is sold in 9-, 15-, 30-, and 80-foot lengths, runs on 120V, generates about 7 watts per linear foot, and has a built-in thermostat that switches on around 3°C and off around 10°C, backed by a 2-year warranty. Prices and stock change, so treat these as dated examples rather than a fixed budget — check the linked listings for current figures before you buy.
| Material | Sizing note | Example (Sept 2026, Home Depot Canada) |
|---|---|---|
| Foam pipe sleeves | Match ID to pipe’s actual OD, not nominal size | Tundra 7/8″ ID × 1/2″ wall × 6 ft — ~$5.48 |
| Foam pipe sleeves, larger | For 1-inch nominal pipe | Tundra 1-3/8″ ID × 1/2″ wall × 6 ft — ~$5.78 |
| Foam elbow / tee fittings | Pre-formed to match sleeve size | Sold individually — check current listing |
| Thermostatic heat cable | Length must suit the run; insulation over it must match cable’s own instructions | WarmlyYours 9/15/30/80 ft kits, 120V, 7W/ft |
Prices shown are as listed on homedepot.ca in September 2026 and will change over time — confirm current pricing before purchasing.

When You Need Heat Cable — and When You Don’t
Heat cable is the right tool for a specific problem — a pipe that must carry water through a space that stays at or below freezing, and can’t be drained. It isn’t the only fix, and it isn’t required everywhere a space is unheated. Three alternatives are worth ruling out first. If a line only serves something seasonal — an outdoor faucet, an unused laundry rough-in in an unheated garage — draining it and shutting off the supply removes the water entirely, and water that isn’t there can’t freeze. If a renovation is already underway, relocating or rerouting the pipe out of the cold space removes the risk permanently instead of managing it every winter. And correcting the space itself — insulating and air-sealing a crawl space or garage so it no longer sits at outdoor temperature, which is the more permanent fix Natural Resources Canada describes for basements and crawl spaces — often does more than wrapping the pipe ever will. Heat cable earns its place when none of those apply: a live line the household needs through the winter, sitting somewhere that genuinely can’t be warmed or drained.
If you do install it, the cable’s own instructions govern what goes over it — this isn’t a step to generalize across brands. Frost King’s installation guidance, as one example, calls for the cable to run flat against the pipe — never spiralled or overlapped — secured with application tape or electrical tape rated to at least 176°F at six-inch intervals, then covered with 1/2-inch fiberglass insulation or an equivalent non-combustible insulation with a vapour seal. It also explicitly rules out installing the assembly inside a wall, floor, or ceiling. A different manufacturer’s cable may call for a different insulation type, thickness, or overlap rule, so read that product’s instructions before you buy insulation to go over it — don’t assume one brand’s spec applies to another’s cable.
How to Insulate Exposed Pipes, Step by Step
Follow the manufacturer’s instructions exactly — laid flat against the pipe, taped at the intervals it specifies, never spiralled — and test that it’s working before you cover anything.
Use the insulation product’s own sizing chart against the pipe’s actual outside diameter — and, if cable is installed, the insulation type and thickness that cable’s instructions call for.
Slide the correctly sized sleeve over the pipe (and cable, if present), then seal the seam with its self-adhesive strip or a wrap of foil tape.
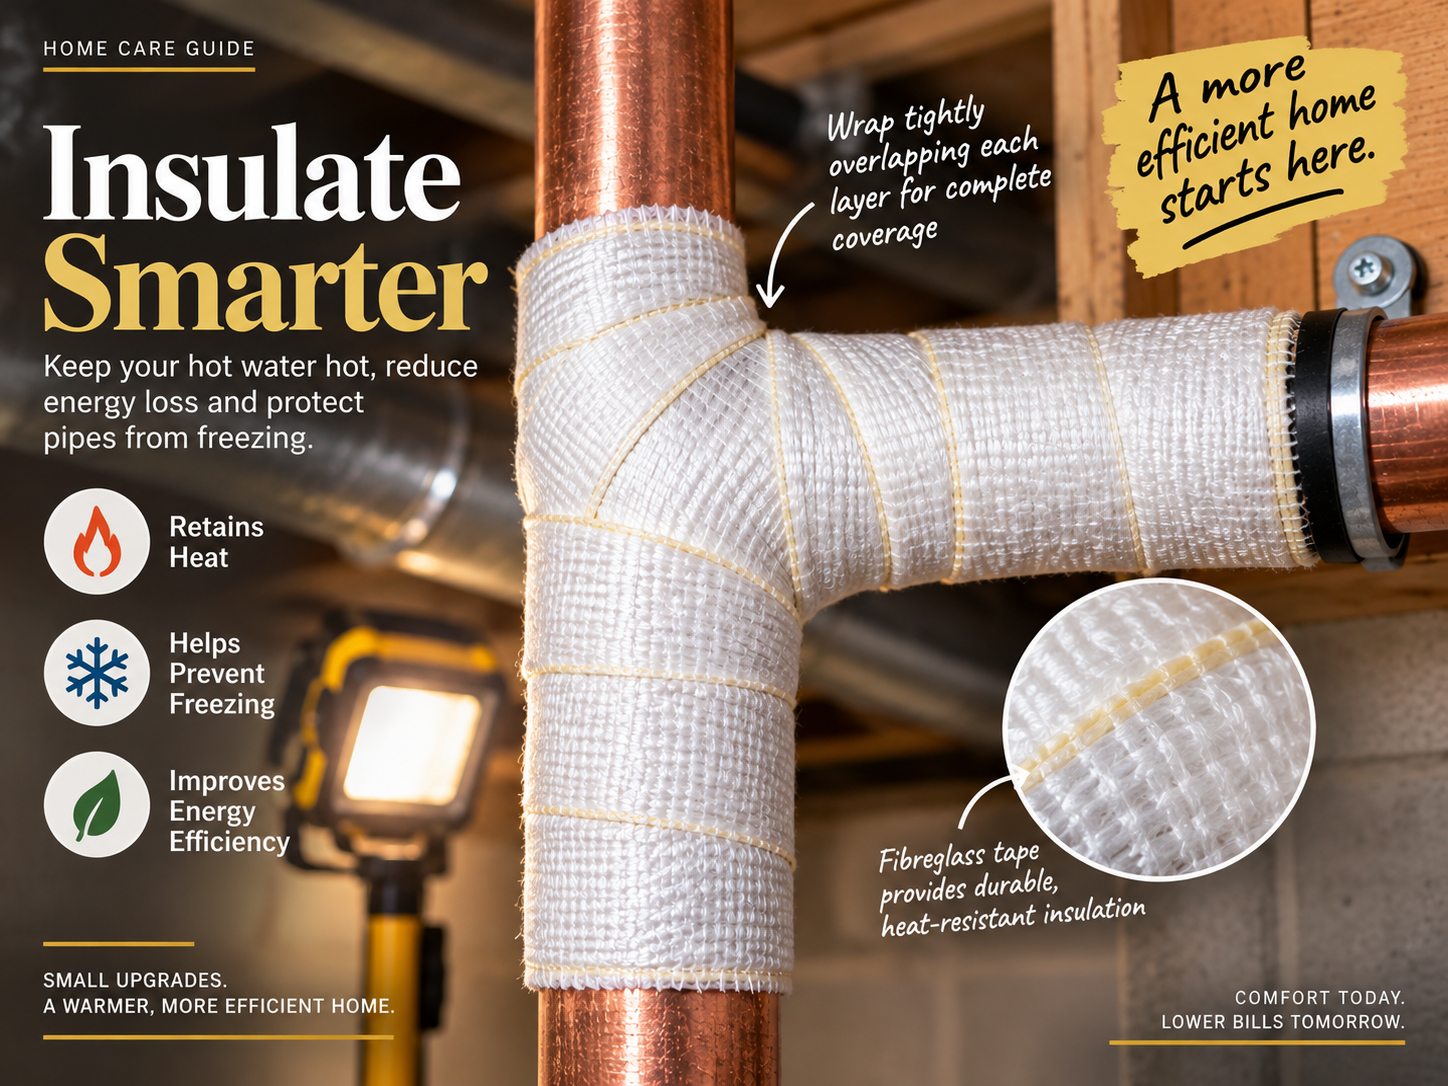
A straight sleeve won’t bend cleanly around a joint — use a pre-formed foam fitting or a wrap of fibreglass tape instead, so there’s no gap at the bend.
Foam left in direct sun and rain degrades over a season or two — add a UV-rated or weatherproof jacket over any run on an exterior wall or outdoors.
Caulk or spray foam the gap where the pipe passes through a rim joist or exterior wall, so cold air stops reaching the insulation from behind — the same gaps a fall draft-proofing pass would already be targeting.
How to Winterize Outdoor Faucets
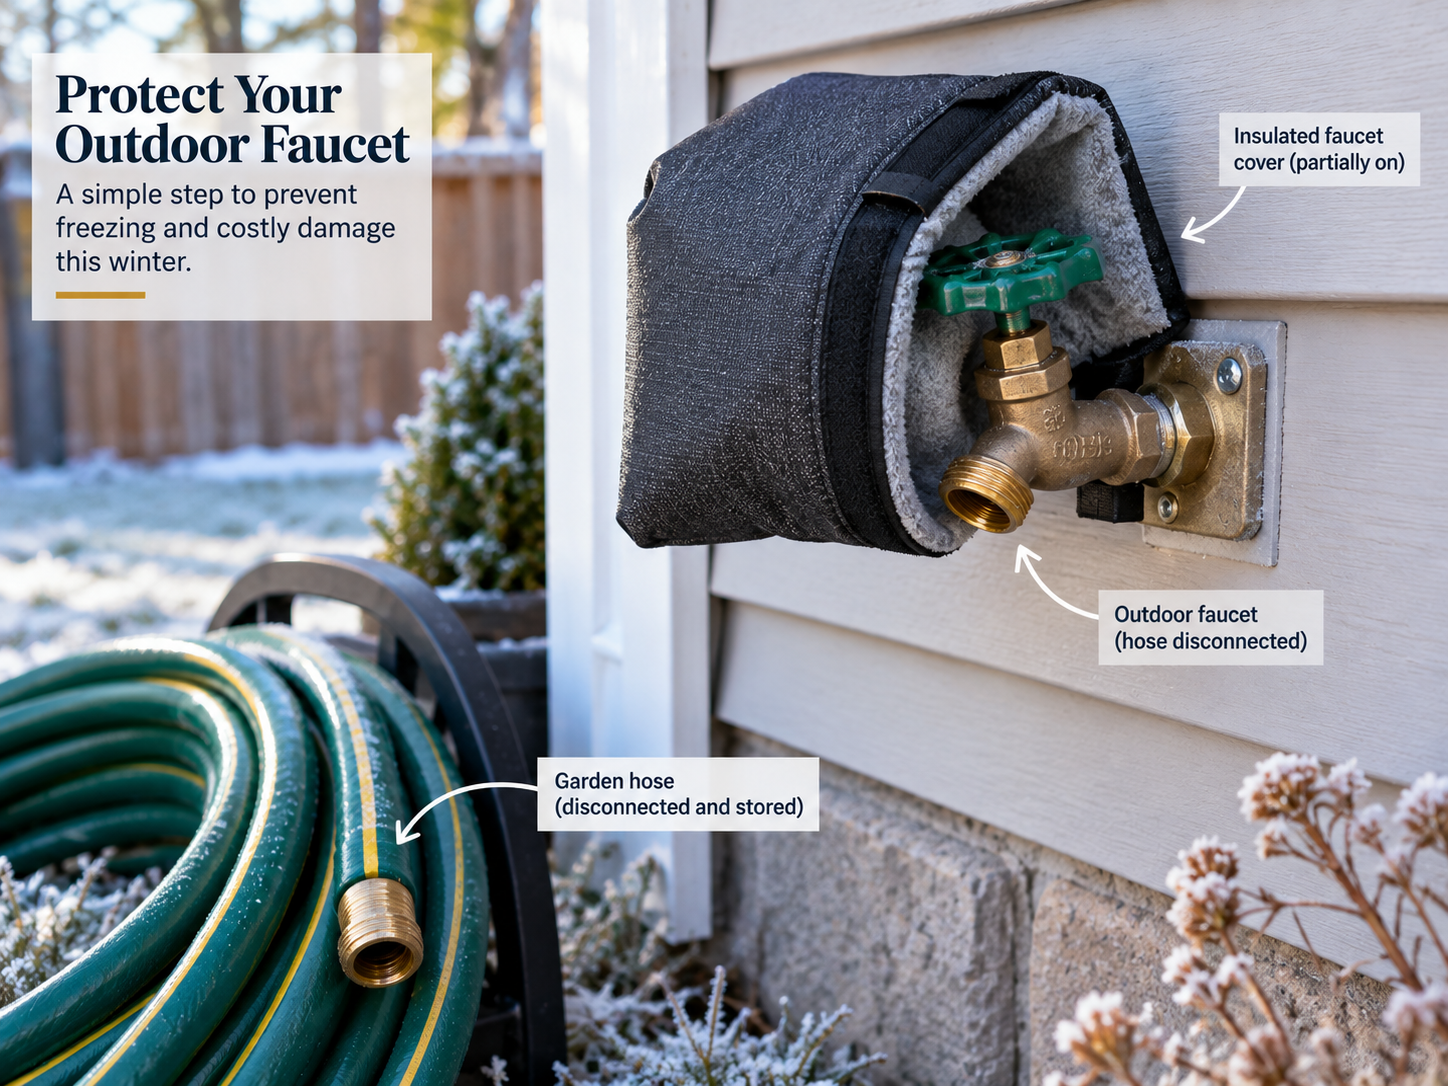
The right steps depend entirely on which type of faucet is mounted outside, so check that first. A conventional sillcock shuts off right at the exterior wall, which leaves a section of pipe between the valve and the spout sitting full of water in the cold. A frost-free (or frost-proof) faucet looks similar from outside but works differently: its valve seat sits on a long stem several inches inside the heated structure, so closing the handle shuts off the water well before the exposed section. If you’re not sure which one you have, remove the hose and look — a frost-free faucet’s shutoff point is noticeably deeper than the wall face.
For a conventional sillcock: disconnect and drain the garden hose, close the interior supply valve, then open the exterior tap and leave it open through winter. According to the American Red Cross, keeping that outside valve open lets any water still trapped in the pipe expand without splitting it, which is exactly why this type shouldn’t be left closed over winter.
For a frost-free faucet: disconnect the hose — this step matters more than people expect, because a hose left attached traps water in the barrel and can cause the faucet to freeze and burst even though the design is meant to prevent that. Once the hose is off, simply close the handle. As Woodford’s own explanation of the design puts it, all the water forward of the valve drains out of the faucet once it’s closed, leaving the exposed tube empty — there’s no water left to freeze, so there’s no need to leave it open the way a conventional sillcock requires. That draining logic is the same one behind blowing out pool lines before an Ontario winter — get the water out, and freezing stops being a threat.
What Your Insurance Actually Expects
Standard home insurance in Canada typically covers sudden, accidental water damage from a burst pipe when reasonable steps were taken to maintain heat in the home — but that’s a general pattern, not a guarantee, and it isn’t the same as a blanket exclusion for the pipe itself. Coverage depends on the specific policy wording and the circumstances of the loss, so the details in your own policy — and a call to your insurer if you’re planning to leave a property unheated or vacant for any stretch of winter — matter more than any general rule. It’s the same logic behind checking a sump pump before fall rains or working through a broader preventative home maintenance checklist each season: confirming what’s actually covered, in writing, beats assuming.
A power outage during an ice storm is worth planning for separately from the pipes themselves, since it can shut off the furnace at the exact moment a home needs it most. Municipal guidance like the City of Guelph’s pairs its pipe-freezing advice with a reminder to have a 72-hour emergency kit ready — that’s a more useful backup plan than a generic space heater, and it avoids the carbon monoxide and fire risks that come with using the wrong kind of supplemental heat indoors.
Common Mistakes, and a Pre-Freeze Checklist
A few mistakes show up more than the rest: treating “insulated” as the same thing as “protected,” when insulation only slows heat loss rather than adding heat — a pipe in air that never rises above freezing will eventually freeze regardless of wrap thickness unless heat, flow, or ambient warmth is added somewhere. Leaving a hose attached to a frost-free faucet all winter, which traps water the design is supposed to drain. Buying insulation by the pipe’s nominal size instead of its actual outside diameter. And, still common, wrapping the visible run through the basement and stopping just short of the last section feeding an outdoor tap.
Does foam pipe insulation prevent freezing? Not on its own, in a genuinely unheated space — it slows the rate of heat loss and buys time, but it doesn’t add heat. Pair it with heat cable, flow, or ambient warmth wherever the surrounding air can sit at or below freezing for extended periods.
Heat cable vs. pipe insulation — what’s the difference? Heat cable actively adds warmth to the pipe. Insulation slows how fast that warmth (or any ambient heat) escapes. In a genuinely unheated space, most manufacturers expect both together, using the insulation type their cable’s instructions call for.
- Walked every crawl space, garage, attic, and exterior-wall run and ranked which pipes are actually exposed to unheated air
- Checked whether any run needs heat cable — and installed it first, per its own instructions, before adding insulation
- Matched insulation to each pipe’s real outside diameter and material using the product’s sizing chart
- Wrapped straight runs, and used formed fittings or tape at elbows, valves, and tees
- Protected any weather-exposed insulation with a UV-rated jacket
- Sealed the air leaks around each pipe penetration, not just the pipe itself
- Identified each outdoor faucet as conventional or frost-free and winterized it accordingly
- Confirmed what your specific insurance policy expects around maintained heat — in writing, if you’re unsure