How to Paint Kitchen Cabinets
in 5 Steps — The Glow-Up
Your Kitchen's Been Waiting For
Your kitchen deserves to feel like a place you actually want to spend time in. Not a chore to get through — a place to pour your morning coffee and breathe. If your cabinets are looking tired, dinged-up, or just very last decade, learning how to paint kitchen cabinets is hands-down one of the smartest, most satisfying upgrades you can give your home. No renovation crew. No blowing your savings. Just you, the right supplies, and a solid plan.
Here's the thing nobody tells you: a kitchen cabinet makeover is not just about aesthetics. It's about waking up every morning and walking into a space that feels intentional — like someone (you!) actually cared enough to make it nice. That feeling is underrated. Your home should feel good to live in, and fresh, painted cabinets are one of the quickest ways to get there.
The good news? You absolutely don't need to be a seasoned DIYer to pull this off. Whether you live in a rented apartment you're slowly making your own, a starter home you're finally settling into, or a forever home getting its first real refresh — painting cabinets step by step is an approachable weekend project that delivers jaw-dropping results. Think of it as a slow Saturday, your favourite playlist, and a cup of something warm.
"The most refreshing home upgrades aren't always the biggest ones. Sometimes a coat of paint is all it takes to fall back in love with the place you call home."
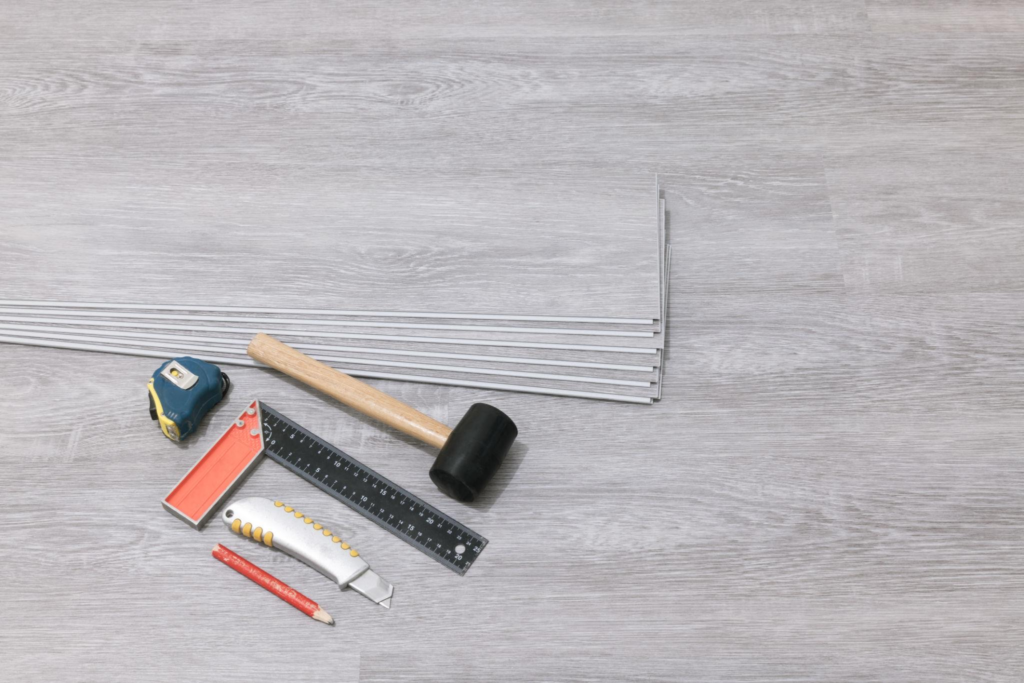
What You'll Need
- TSP cleaner or degreaser
- 120 & 220-grit sandpaper
- Quality primer (shellac or bonding)
- Cabinet-specific paint
- Angled brush + foam roller
- Painter's tape & drop cloths
- Screwdriver & zip-lock bags
- Tack cloth or microfibre cloth
- Topcoat/polycrylic sealer
- New hardware (optional but fun)
How to Paint Kitchen Cabinets: 5 Steps That Actually Work
Follow this sequence and you won't be sanding over dried drips or wondering where the finish went.
Clear Out, Wipe Down & Deep Clean
Before a single drop of paint touches wood, your cabinets need to be immaculately clean. Kitchen grease is paint's worst enemy — it creates a slick barrier that stops primer from bonding properly. Remove all cabinet doors, drawer fronts, and hardware. Pop screws and hinges into labelled zip-lock bags so nothing goes missing. Then give every surface a thorough scrub with a TSP (trisodium phosphate) cleaner or a good-quality degreaser. Don't rush this step. Really let it sit and cut through years of cooking residue.
Once wiped down, rinse clean and let everything dry completely — ideally overnight. Patience here pays off enormously once you see how smoothly the primer glides on later.
Lightly Sand, Then Prime for a Perfect Bond
This is the step that separates a paint job that lasts five years from one that starts peeling by winter. You don't need to strip your cabinets down to bare wood — a light scuff with 120-grit sandpaper is enough to break the existing sheen and give the primer something to grip. Many people wonder about how to paint kitchen cabinets without sanding entirely — and while liquid deglosser is an option, a light sand still gives you the most reliable finish.
After sanding, wipe every surface with a tack cloth to remove all dust. Then apply a high-quality primer — shellac-based or a bonding primer are the go-to choices for kitchen cabinetry. Work in thin, even coats. Two light coats beat one heavy one every time. Let each coat dry fully before moving on.
Choose the Best Paint for Kitchen Cabinets
Not all paint is created equal. For cabinets specifically, you want a paint that dries hard, resists moisture, and holds up to daily wear. The best paint for kitchen cabinets is typically an alkyd-based paint or a water-based enamel with a hardener added. These give you that beautifully tough, almost factory-finished surface. Avoid standard wall paint — it stays slightly soft and will show every fingerprint.
As for colour: this is where the fun really starts. Deep navy and forest green are having a massive moment — they bring a moody, editorial feel that photographs beautifully. Warm off-whites and soft sage tones lean into that cosy, lived-in aesthetic. Even a bold terracotta or dusty mauve can turn a tired kitchen into a genuine design statement. Grab sample pots and live with them on a piece of card for a few days before committing. Light changes everything — check your swatch in morning light and evening lamplight.
Paint Like a Pro — Brush, Roll & Repeat
Here's your kitchen cabinet painting tips moment. The technique really does matter. Start by using an angled brush to cut in around edges, recesses, and panel details. Then use a small foam roller on the flat surfaces for a smooth, streak-free finish. Always paint in the direction of the wood grain. Apply thin coats — two or three thin layers will always look better than one thick, goopy coat that sags and drips.
Paint your doors and drawer fronts flat on a table or sawhorses — never while they're hanging. This prevents drips and gives you full control. Let each coat dry according to the manufacturer's guidance. Once fully dry, sand lightly with 220-grit between coats and wipe clean before the next one goes on. The finish should get visibly better and smoother with each layer.
For the cabinet boxes (the frames that stay on the wall), use painter's tape along the walls and countertops to protect them, then follow the same brush-and-roll technique.
Seal, Reassemble & Style Your Refreshed Kitchen
Once your final coat is completely dry — and we mean completely, not just dry to the touch — apply a clear topcoat or polycrylic sealer. This adds an extra layer of protection against moisture, cleaning products, and the general chaos of kitchen life. Use a water-based polycrylic over light colours; it won't yellow. For darker shades, an oil-based topcoat is fine.
Now comes the best part: putting it all back together. Rehang your doors using your labelled bags to match everything up. Then take a moment before you put a single thing back inside — this is your chance to do that DIY kitchen refresh properly. Wipe down your shelves, line them if you like, and think about what actually needs to go back in and what can quietly find a new home elsewhere. Decluttering your cabinets while they're empty is a gift to yourself.
Finally, swap out the hardware if your budget allows. New handles and knobs are the jewellery of a cabinet — they cost relatively little and make an outsized difference to the overall look. Brushed brass and matte black are both big right now and both work beautifully with almost any cabinet colour.
The Colour Conversation You Actually Need to Have
Colour is where a kitchen cabinet transformation really comes to life — and it's also where people get the most stuck. Here's a simple way to think about it: consider the mood you want in your kitchen, not just the colour. Do you want it to feel calm and airy? Go warm whites, creamy linens, or a soft sage green. Do you want it to feel bold and characterful, like a room with real personality? Try a deep hunter green, a rich navy, or even a deep charcoal. Do you want something that feels a little warmer and more unexpected? Look at clay tones, warm terracotta, or dusty blush.
One approach that works beautifully in modern kitchens is two-tone cabinetry: upper cabinets in a lighter shade, lower cabinets in something deeper and more grounded. It adds visual depth and dimension without the commitment of going all-in on a strong colour. It's also a very forgiving way to ease into a bolder palette.
Common Mistakes to Avoid When Painting Kitchen Cabinets
Even the best paint kitchen cabinets DIY projects can go sideways without a bit of awareness. Skipping the degreasing step is by far the most common error — it leads to paint that peels within months. Applying paint too thickly in one go creates drips and an uneven, almost plastic-looking surface. Using the wrong paint (like a flat wall paint) means you'll have a finish that scuffs and marks easily. And not letting each coat dry long enough before adding the next one causes adhesion problems.
The other one worth mentioning: don't let the scale of the project intimidate you into rushing. Spread it across a weekend rather than trying to cram it all into one afternoon. Good things take a little time, and a kitchen that makes you happy every single day is worth every hour you put into it.
💡 Quick Budget Kitchen Upgrade Wins
While your cabinet doors are off and drying, this is the perfect moment to think about a few other small changes that land big. None of these need to cost much:
- Replace dated or mismatched hardware with a cohesive set
- Add peel-and-stick shelf liner inside cabinets and drawers
- Swap your kitchen tap for a brushed metal finish to match new hardware
- Paint your kitchen island a contrasting colour for a built-in look
- Add under-cabinet lighting strips — warm light transforms the whole space
What's Trending Right Now in Kitchen Cabinet Makeovers
The world of modern kitchen update ideas has moved far beyond all-white everything. If you're looking for a fresh direction, here's what's resonating most in homes right now. Forest and olive greens have taken over from grey as the go-to neutral-that-isn't-a-neutral — they feel natural, grounded, and pair beautifully with brass hardware and natural wood accents. Warm whites and creamy bone tones are replacing stark, clinical whites — they feel softer, more human.
The textured finish trend is also worth exploring. Limewash-style paint techniques and layered, slightly imperfect finishes give cabinets a handcrafted, artisanal feel that looks anything but basic. If you want something that photographs beautifully and feels uniquely yours, experimenting with texture is a genuinely exciting direction.
For those doing a kitchen renovation on a budget, the biggest style upgrade per dollar spent remains simple: paint, new hardware, better lighting. Those three things, done well, can make a kitchen that was built in 2005 look like it belongs in an interior design feature. The goal isn't perfection — it's intention. And intention comes across in every room, every time.
Your Kitchen, Your Rules — Now Go Paint Something Beautiful
How to paint kitchen cabinets in a way that actually lasts, looks professional, and makes your home feel genuinely better to be in — that's exactly what this guide was built to help you do. And now you have it. Every step, every tip, every colour thought.
Here's the thing worth sitting with: your home is not a project to be completed. It's a living, evolving space that grows with you. Updating it should feel exciting, not stressful. A kitchen cabinet transformation is one of those rare home improvements that's both achievable in a weekend and genuinely life-improving once it's done.
So pull out the sandpaper, pick a colour that makes you a little happy just looking at it, and spend a Saturday doing something good for the space you live in. The only question now is: what colour are you going with?