How to Replace a Tile Backsplash — Your Complete, Calm & Confident Step-by-Step Guide

There is something almost magical about walking into a kitchen that feels genuinely yours. Not renovated for someone else, not frozen in the design choices of a decade ago — but refreshed, intentional, and alive. Learning how to replace a tile backsplash is one of the most satisfying upgrades you can make to your home, and it doesn't take a contractor, a big budget, or a week of chaos to pull it off.
Whether your current backsplash is chipped, stained, dated, or simply just not you anymore, replacing it is a weekend project that delivers a genuinely dramatic transformation. The backsplash sits right in the heart of your kitchen — the place where you pour your morning coffee, prep Sunday dinners, and stand chatting with whoever wanders in. Getting it right feels like a gift to yourself.
This guide walks you through how to replace a tile backsplash from start to finish — including how to prep your kitchen properly, which tiles work best, how to remove the old ones without destroying your walls, and how to grout and seal your way to a finish that looks like it was done by a professional. Let's begin.
Why Replacing Your Backsplash Is One of the Best Home Upgrades You Can Make
The kitchen backsplash is a small surface that carries a lot of visual weight. It bridges the countertop and the upper cabinets, frames the cooktop, and sets the tone for the entire room. When it's dated or damaged, it quietly pulls the whole space down. When it's beautiful, it quietly elevates everything around it.
A kitchen backsplash replacement doesn't require gutting the room. You don't need to replace cabinets, rip out countertops, or repaint everything. A new backsplash alone can modernize a kitchen that hasn't changed in twenty years, and doing it yourself makes it genuinely affordable. Many homeowners complete the full tile backsplash installation project — removal, prep, setting, and grouting — over a single long weekend.
"A new backsplash is one of the few kitchen upgrades where the effort you put in is immediately, visibly, obviously worth it — you see it every single day."

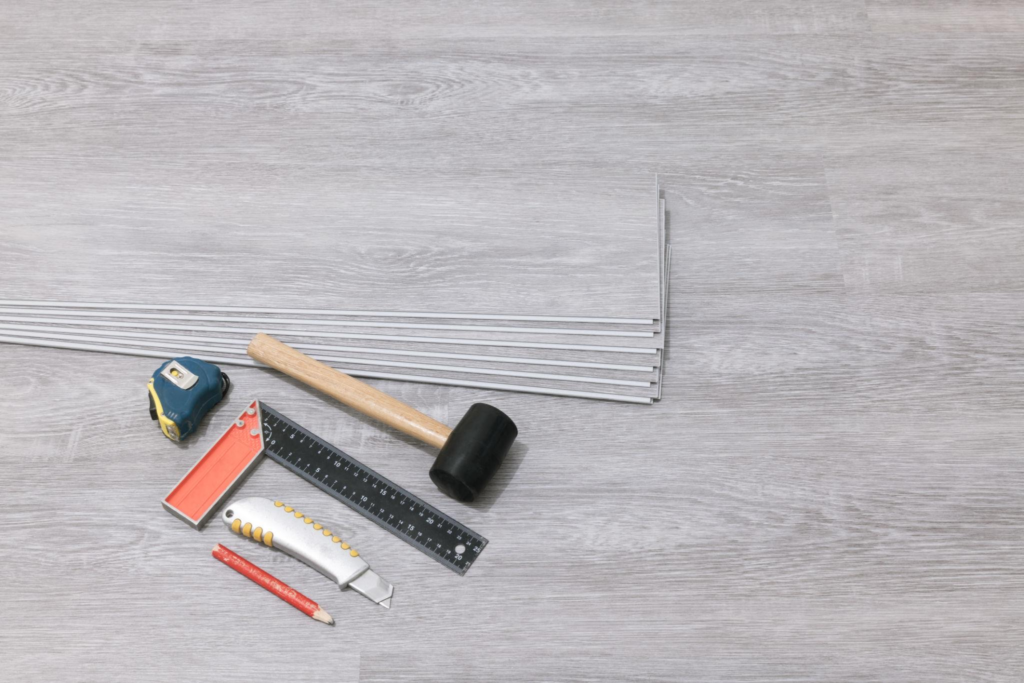
What You'll Need: Tools & Materials Checklist
Before you start pulling tiles off the wall, gather everything you need. A well-prepared workspace makes the whole process calmer and more enjoyable. Here's the full list:
Buy 10–15% more tile than your measurements call for. Cuts, breakage, and small layout changes will eat into your supply, and nothing is more frustrating than running one sheet short at the end. Always buy extra from the same lot number to ensure colour consistency.
Choosing the Best Tile for Your Kitchen Backsplash
One of the most enjoyable parts of learning how to replace a tile backsplash is standing in a tile shop (or scrolling through gorgeous options online) and imagining the possibilities. The best tile for a kitchen backsplash depends on your cooking style, your aesthetic, and how much maintenance you want to do long-term.
Subway Tile
The classic 3×6 ceramic. Timeless, beginner-friendly, easy to cut, and available in every colour imaginable.
Best for BeginnersPorcelain
Denser and less porous than ceramic. Extremely durable and stain-resistant — ideal for heavy-use kitchens.
Most DurableNatural Stone
Marble, travertine, slate — beautiful and unique. Requires sealing but brings warmth and texture nothing else can match.
Most LuxuriousGlass Mosaic
Reflects light beautifully. Great for smaller kitchens. Requires a white adhesive so the colour reads true.
Most DramaticPeel & Stick
No mortar, no grout. Renter-friendly and fast to install. Less durable near heat and steam, but endlessly easy.
Easiest InstallZellige / Terracotta
Handmade Moroccan-style tiles with a beautiful imperfect glaze. Full of character and warmth. Trending strongly in 2026.
Most CharacterFor most first-time DIYers, starting with a subway tile backsplash is the smartest move. The tiles are uniform, lightweight, and straightforward to cut. Once you've done one project with them, you'll be ready to tackle more complex patterns like herringbone or offset brick.
How to Prep Your Kitchen Before Replacing the Backsplash
Knowing how to prep your kitchen correctly is where most DIY tile projects either succeed or struggle. The preparation stage isn't glamorous, but it is the thing that separates a professional-looking result from one that chips, cracks, or grouts unevenly within a year.
Here's how to set yourself up for success:
Clear and protect the work area
Remove everything from countertops near the backsplash. Lay drop cloths or old towels across the countertop surface and inside the sink — tile chips and grout dust will land everywhere, and protecting your counter from sharp debris is essential. Turn off the electricity to any outlets in the backsplash area and remove the outlet covers and switch plates.
Score the grout lines
Using a utility knife or an oscillating multi-tool fitted with a grout blade, score all the grout lines on the existing backsplash. This breaks the bond between the tiles and the wall, making removal significantly easier and reducing the risk of pulling off chunks of drywall with the tile. Take your time with this step — it pays off enormously.
Remove the old tiles gently
Start at a corner or near a grout line where you can get the putty knife behind the tile. Tap the handle gently with a rubber mallet, working at a shallow 30-degree angle to the wall. Work slowly outward from your starting point. The goal is to separate the tile from the adhesive, not to lever the entire wall off. Old mastic adhesive comes off differently than thinset mortar — mastic tends to peel, while thinset requires more careful chipping.
Clean up the wall surface
Once all tiles are removed, assess the wall. Scrape away remaining adhesive with the putty knife. If the drywall has small gouges, fill them with lightweight joint compound and let it dry fully (usually 24 hours). Sand smooth once dry. If the drywall is significantly damaged or shows any signs of moisture, replacing it with cement backer board before tiling is the right call — especially near the sink.
Prime the wall (if needed)
If you've applied joint compound, prime those patches with a PVA primer or tile primer before setting new tiles. Fresh joint compound is highly porous and will absorb moisture from your adhesive unevenly if left unsealed, potentially causing adhesion problems. A quick coat of primer takes 30 minutes and prevents headaches down the road.
Older homes (pre-1980) may have tiles set with an adhesive that contains asbestos. If the existing backsplash is very old and the adhesive is a black or grey mastic, consider having a sample tested before disturbing it. Your local hardware store or contractor can advise on testing kits or remediation services.


How to Replace a Tile Backsplash: The Installation Steps
With your wall prepped and your tiles chosen, it's time for the part that actually feels like building something. This is where kitchen backsplash replacement becomes genuinely satisfying work.
Plan your layout before you spread any adhesive
Hold tiles up against the wall (dry-fit) before committing to mortar. Mark a level horizontal line across the centre of your backsplash area using a spirit level — this is your guide line. Aim to have equal tile cuts at both ends of each row rather than starting flush on one side and ending with an awkward sliver on the other. Symmetry feels much better in the finished product.
Apply the tile adhesive
Using a notched trowel, spread tile mastic or thinset mortar over a manageable section of the wall — roughly 2–3 square feet at a time. Hold the trowel at a 45-degree angle to create even ridges. Work in small sections so the adhesive doesn't skin over before you've set your tiles. For glass tiles, use a white adhesive so the colour shows true.
Set the tiles with a firm press and a slight twist
Press each tile firmly onto the adhesive bed, giving it a slight twist as you seat it. This ensures full contact with the mortar. Use tile spacers at every corner junction to keep your grout lines consistent. Use your level regularly — even half a tile's worth of drift will be noticeable in the final result. Mesh-backed mosaic tiles make this process faster since an entire sheet of small tiles sets at once.
Make your cuts cleanly and carefully
Use a tile cutter (for straight cuts) or a wet saw (for curved cuts around outlets). Measure twice, cut once — the old advice holds perfectly here. A diamond blade wet saw rents cheaply from most hardware stores for a day and makes cuts that a manual tile cutter simply cannot. Around outlets, use a tile nibbler or a drill with a hole-saw bit to create clean circular cutouts.
Let the adhesive cure — fully
Once all tiles are set, wait a minimum of 24 hours before grouting. Many thinsets recommend 48 hours. This is non-negotiable — grouting over uncured adhesive causes the grout to crack. Use this waiting period to clean up, reinstall your outlet covers (once the power is safely back on), and simply admire how different the kitchen is already starting to look.
"The wait between setting and grouting is the hardest part of any tile project. It also happens to be the most important."
Grouting, Sealing & the Finishing Touches
Grouting is the step that transforms a wall full of individual tiles into a cohesive, beautiful surface. It's also surprisingly meditative work — spreading, wiping, cleaning in smooth rhythms. Here's how to do it well.
Mix and apply the grout
Remove all tile spacers before you begin. Mix your grout to a peanut butter consistency — thick enough to hold its shape but smooth enough to spread. Using a rubber grout float held at a 45-degree angle, press the grout firmly into the joints, working diagonally across the tile surface. Hold the float nearly flat to pack grout deep into the joints, then angle it steeply to scrape off the excess.
Clean the tiles as you work
Work in sections of about 4–5 square feet. After grouting a section, wait 15–20 minutes until the grout begins to firm up, then use a barely damp sponge to wipe diagonally across the tiles — never straight across a grout line. Rinse your sponge constantly. You'll probably do 3–4 passes before the tiles are truly clean. A milky haze will remain on the tile faces; this is normal.
Polish away the grout haze
Once the grout has fully cured (24–48 hours), buff the remaining haze off the tile faces with a dry microfibre cloth. For stubborn haze, a diluted grout haze remover product works well. This is the step where your kitchen backsplash upgrade truly reveals itself — tiles catching the light, lines crisp and even, the wall looking completely intentional.
Caulk the transitions, not the corners
Never grout the joint where the backsplash meets the countertop or where two walls meet at a corner. These joints are movement joints — the two surfaces expand and contract at different rates, and grout in these spots will crack. Instead, fill them with a colour-matched silicone caulk. Apply with a caulk gun, smooth with a wet finger, and let it cure for 24 hours before using the kitchen normally.
Seal the grout
After grout is fully cured (48–72 hours), apply a penetrating grout sealer with a foam applicator brush. Wipe off any excess from the tile faces. Sealing closes the pores of the grout, protecting it from cooking grease, steam, and daily splashes. It's a 20-minute task that dramatically extends the life and appearance of your kitchen backsplash replacement. Plan to re-seal annually.

Insider Tips That Make Your Backsplash Installation Go Smoother
After hundreds of homeowner experiences with DIY tile backsplash removal and installation, a few hard-won lessons keep coming up. These small adjustments make a measurable difference in both the process and the outcome.
Work top to bottom when tiling over the stove. The area directly above a cooktop sees the most heat and grease. Use a vitrified porcelain or glass tile in this zone — they're the most heat-resistant and the easiest to wipe clean after cooking.
Tape off your countertop edge before grouting. A strip of painter's tape along the countertop edge keeps grout off the surface and gives you a clean caulk joint line. Peel it off while the grout is still slightly workable, not after it's fully hard.
Start your layout from the focal point, not the corner. The eye naturally goes to the area above the stove or sink. Centre your layout there — even if it means awkward cuts in the corners — and the finished result will look intentional and balanced.
Don't tile over a damp wall. If there's any moisture in the drywall from a previous leak, even a tiny one, tiling over it traps that moisture and can lead to mould behind your new tiles within a year. Fix the source, let the wall fully dry, then tile.
Kitchen Backsplash Ideas That Are Redefining Home Kitchens in 2026
Part of the joy of replacing your kitchen backsplash is that you get to decide what the next chapter of your kitchen looks like. Here are the styles that are resonating most strongly with homeowners in 2026 — not because they're fashionable, but because they make kitchens feel deeply considered and genuinely lived in.
Full-Height Backsplash (Counter to Cabinet)
Rather than a traditional 4–6 inch tile strip, a full-height backsplash runs the entire distance from the countertop to the underside of the upper cabinets — sometimes 18 inches or more. It looks intentional, architectural, and makes the kitchen feel significantly larger. Subway tiles in this format are particularly striking.
Zellige & Handmade Tile
The imperfect, irregular glaze of Moroccan zellige tiles brings a warmth and humanity that factory-perfect tiles simply cannot match. Each tile is slightly different — varied in tone, texture, and surface — and together they create a surface that changes as the light moves through the day. A beautiful choice for anyone who wants their kitchen to feel warm and characterful rather than showroom-perfect.
Limewash-Effect Tile
Taking cues from limewash plaster walls, these tiles have a soft, aged, cloudy finish that feels Mediterranean and grounded. Paired with open shelving and warm wood tones, they create kitchens that feel like they have always been there — effortlessly comfortable.
Large Format Tiles with Minimal Grout Lines
Fewer, larger tiles mean fewer grout lines — which means less cleaning and a sleeker, more contemporary look. Rectified large-format porcelain tiles (600×600mm or bigger) can be laid with near-invisible 1mm grout joints for a surface that reads almost like a single sheet of material. Stunning above a dark countertop.
Frequently Asked Questions
How long does it take to replace a tile backsplash?
For most kitchens, the full process takes about 2–3 days spread across a weekend. Day one covers tile removal and wall prep. Day two is installation. Day three is grouting and sealing. Rushing the drying stages is the most common DIY mistake, so giving each phase its proper time makes a huge difference in the final result.
Do I need to remove drywall when replacing a backsplash?
Not always. If the drywall behind the old tiles is in good condition with no moisture damage, you can repair any gouges with joint compound and tile straight over it. However, if the drywall is soft, mouldy, or crumbling, replacing it with cement backer board before tiling is strongly recommended — especially in areas near the sink.
What is the easiest type of tile to use for a DIY backsplash replacement?
Subway tiles (3×6 inch ceramic) are widely considered the most beginner-friendly because they are lightweight, easy to cut, and forgiving in layout. Peel-and-stick tiles are even simpler — no mortar, no grout required — though they don't have quite the same durability as traditional ceramic or porcelain tiles for long-term kitchen use.
How do I remove old kitchen backsplash tiles without damaging the wall?
Start at a corner or a grout line. Score the grout first with a utility knife or oscillating tool. Then use a wide putty knife or flat chisel and a rubber mallet to gently pry tiles away from the wall at a shallow angle. Work slowly and methodically — patience here saves you significant repair work later, and the wall beneath will thank you for it.
Do I need to seal the backsplash grout after installation?
Yes — sealing grout is highly recommended for kitchen backsplashes. Grout is porous and will absorb cooking grease, steam, and moisture over time. A penetrating grout sealer applied 48–72 hours after grouting keeps lines looking clean and dramatically extends the life of your new backsplash. Plan to re-seal once a year as part of your normal kitchen care routine.
Can I tile over existing backsplash tiles?
Technically yes, but it comes with trade-offs. The combined weight of two tile layers can be significant, and you'll lose depth at your outlets and switch plates. It also traps any moisture beneath the new layer. Most professionals recommend full removal first for a cleaner, longer-lasting result — but tiling over existing tiles can work if they are in excellent condition and firmly adhered.
How much tile do I need to buy for a kitchen backsplash?
Measure the total square footage of the area you want to tile (length × height for each section), then add 10–15% extra to account for cuts, waste, and breakage. For patterned tiles like herringbone or diagonal layouts, add up to 20% extra. Always buy from the same lot number — tile colour can vary between production runs, and running short mid-project is genuinely painful.
What tools do I need to replace a kitchen backsplash?
The essentials are: a utility knife, wide putty knife or flat chisel, rubber mallet, notched trowel, tile spacers, level, tile cutter or wet saw, grout float, sponge, bucket, and a caulk gun. Materials include tile adhesive or mortar, grout, silicone caulk, and penetrating grout sealer. An oscillating multi-tool is optional but makes grout removal significantly faster and easier.