

How to Tune Up and Sharpen Lawn Mower Blades Before Winter Storage
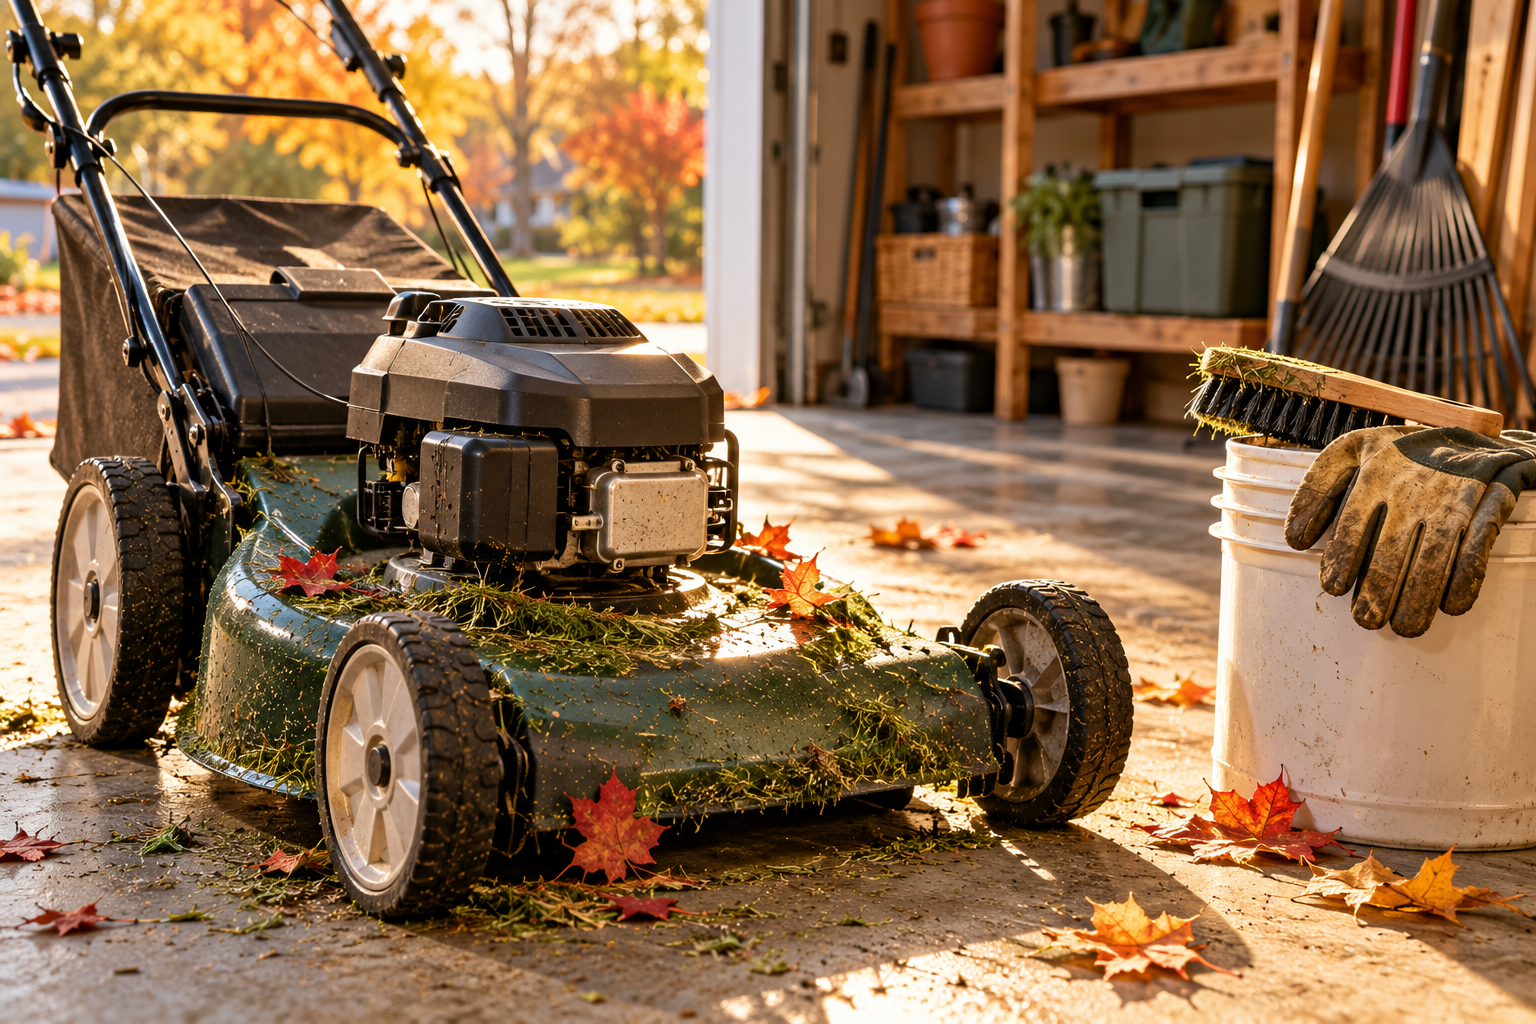
The best moment to sharpen a lawn mower blade is the afternoon of the final mow, while the deck is still caked with clippings and the machine is already out of the garage. This guide shows how to tune up and sharpen lawn mower blades before winter storage: inspecting the blade, deciding whether to sharpen or replace it, balancing it, and putting a gas or battery mower away so it starts cleanly in spring. A dull but straight blade can be sharpened at home. A cracked, bent or badly worn one cannot. Either way, disconnect the power source before you touch it. After sharpening, the blade has to be checked for balance before it goes back on, because uneven metal removal makes a mower vibrate. Gas and battery mowers also need different storage steps, and your operator’s manual overrules anything general you read here, including this.
The workflow at a glance
- Finish the last mow, then shut down and disconnect the power source.
- Clean the deck and the underside of the mower.
- Remove, clean and inspect the blade.
- Sharpen it or replace it.
- Balance it, then reinstall it the right way up.
- Finish the gas or battery tune-up your manual calls for.
- Dry everything and store it away from salt and chemicals.
- Leave yourself a note for spring.
Should You Sharpen Lawn Mower Blades Before Winter?
Short answer
Yes, if the blade is dull but structurally sound. The end of the season is a practical time to inspect it, sharpen it and put the mower away ready for spring.
Autumn has real advantages. The mower is already on your mind, a damaged blade can be ordered at leisure instead of in the first warm week of April, and the job is done before a long stretch of storage where a neglected edge can start to rust. In Ontario the last mow usually lands somewhere between late October and mid-November, once growth stops, and that timing belongs to your lawn rather than the calendar. Our fall lawn care schedule for Ontario walks through the rest of that season, and our comparison of aerating vs. dethatching helps if you still have lawn work to finish before the mower is parked.
Condition matters more than date. Home Depot Canada’s guide suggests sharpening before the first cut of the year and once more during the season, and sharpening straight away after hitting a rock or other hard object. Another common rule of thumb, from Home Depot’s sharpening guide, is every 20 to 25 hours of mowing. So if you sharpened in July and have mowed only a few times since, you may only need to inspect the blade now. Sharpening a blade that doesn’t need it just removes metal and invites imbalance.
One trade-off deserves a mention: a freshly filed edge is bare steel, and it will sit in a cold garage for months. Clean it, dry it, store the mower somewhere dry, and check the blade for corrosion when spring arrives.
Signs Your Lawn Mower Blade Needs Sharpening
Look at the grass first
A sharp blade slices grass cleanly. A dull one tears it, and the torn tips turn ragged, frayed and brownish within a day or two. Home Depot Canada notes that dull blades leave grass ragged and more vulnerable to disease. Check the grass tips a day after your last couple of cuts. Torn, frayed tips are the clue to investigate sharpness.
Vibration is a different problem. If the mower suddenly shakes harder than usual, stop mowing and inspect the blade for damage, looseness or imbalance before you think about sharpening. CCOHS notes that damaged blades cause vibration and that vibration can loosen the blades.
Inspect the blade
With the power disconnected and gloves on, look for a rounded cutting edge, small nicks, surface rust, thinning metal and any damage near the
hole. Nicks and rounding are normal wear. Cracks, bends and deep gouges are not, and they change the decision from sharpening to replacing.
Sharpen or Replace? Inspect the Blade Before You Start
The rule of thumb
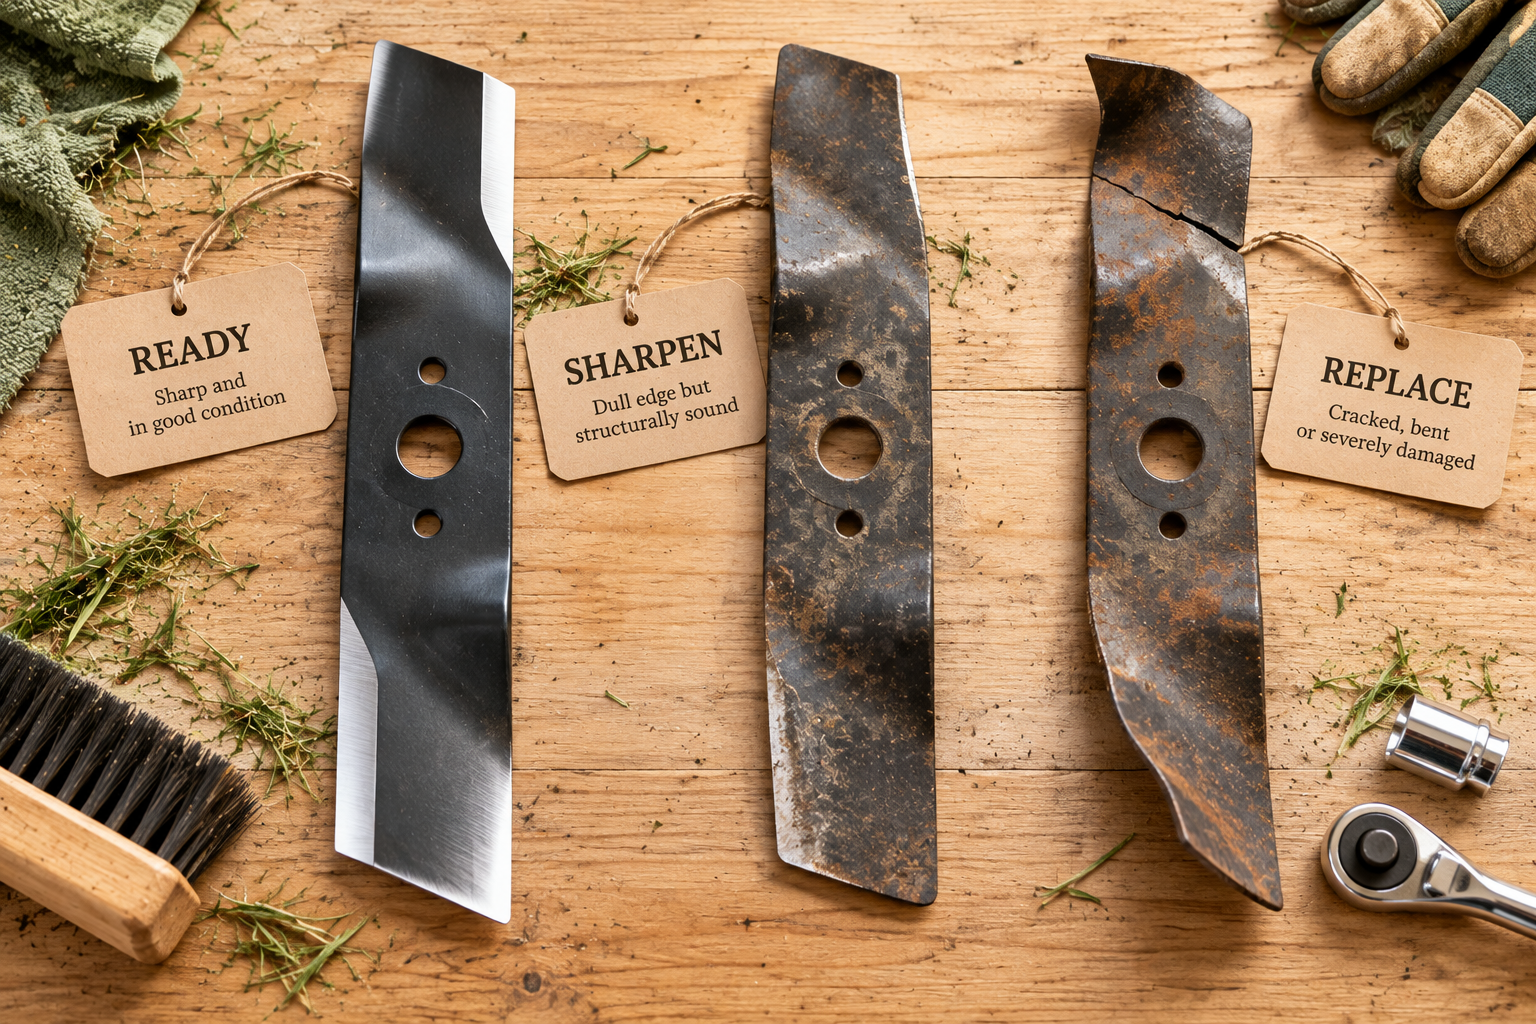
Dull or lightly nicked: sharpen. Cracked, bent, badly thinned or impossible to balance: replace.
| Blade conditionAction |
|---|
| Dull but straightSharpen |
| Minor nicksUsually sharpen |
| Surface rustClean and inspect, then sharpen if it is still sound |
| CrackedReplace |
| BentReplace (and check the engine shaft if you hit something hard) |
| Deeply gougedReplace |
| Thinned by repeated sharpeningReplace |
| Worn or damaged mounting holeReplace |
| Cannot be balancedReplace, or have a shop inspect it |
The Canadian Centre for Occupational Health and Safety (CCOHS) makes the safety case plainly in its riding-mower fact sheet: damaged blades cause vibration, and vibration can loosen the blades. When you do replace one, Troy-Bilt Canada’s maintenance guidance says to use the manufacturer’s own blade, because parts that don’t match the original specification can compromise performance and safety. Buy by model number, not by lookalike.
Tools and Supplies You’ll Need
Most of this job needs tools you probably own. The balancer is the one worth buying, and it is inexpensive.
- Basic: cut-resistant gloves, eye protection, a socket or wrench that fits the blade bolt, a block of wood to stop the blade turning, a vise, a metal file, a blade balancer, a scraper or stiff brush, rags, and a torque wrench if your manual specifies a torque.
- Optional: a drill-mounted sharpening attachment, an angle grinder or bench grinder, penetrating oil for a stubborn bolt, and a corrosion-protection product your manufacturer permits.
File vs. grinder vs. sharpening attachment
No single method wins. A hand file is slow but forgiving, which is why I’d start there. Fast tools remove metal faster than your eye notices, and they can overheat the edge.
| MethodBest forSpeedControlBeginner-friendly? |
|---|
| Hand fileRoutine sharpeningSlowExcellentYes, the best starting point |
| Drill attachmentRoutine DIY touch-upsMediumGoodYes |
| Angle grinderHeavy wearFastLowerExperienced users |
| Bench grinderWorkshop sharpeningFastGood with skillExperienced users |
| Professional serviceDamaged blades, or if you’re unsureDrop-offProfessionalEasiest |
How to Sharpen Lawn Mower Blades Before Storage
Do these steps in order. The very first one is the one that keeps your fingers.
Shut down and disconnect the power source
Gas: turn the engine off, let it cool completely, remove the key if there is one, and pull the spark plug wire according to your manual. Battery: switch off, remove the safety key if your mower has one, and take the battery out. Corded: unplug it. CCOHS says to disconnect the spark plug before any repair or adjustment so the engine cannot start for any reason. Treat the blade as live until the power source is physically out of the picture.
Position the mower safely
Which way a mower tips is model-specific. The manual for one common walk-behind model has you lift the side with the muffler or spark plug (Murray’s blade-removal FAQ), but yours may differ. Tipping the wrong way can let oil or fuel run into the air filter or carburetor, so check the manual before you lift anything.
Mark the blade orientation
Before you loosen anything, photograph the blade and mark the side that faces the ground with a paint pen. Note the order of washers and spacers. Installed upside down, a blade won’t cut properly, and Murray warns it can cause an accident.
Remove the blade
Wedge a block of wood between the blade and the deck so it can’t spin, then turn the bolt with the correct socket. Keep the hardware in the order it came off. If the bolt is seized, stop and consult the manual or a shop rather than improvising with a longer pipe. Some mowers use special washers, and the orientation matters.
Clean and inspect the blade
Scrape off grass and dirt until you can see bare metal, then check the edge, the lift wings and the mounting area. Look for cracks, bends and heavy corrosion. Still structurally sound? Carry on. Damaged? Stop and replace it using the table above.
Follow the existing factory bevel
Don’t invent a new angle. Match the bevel already on the blade, and check your mower or blade manufacturer’s instructions. Plenty of guides quote a single “correct” number, but blades differ, and a generic figure is worse than none.
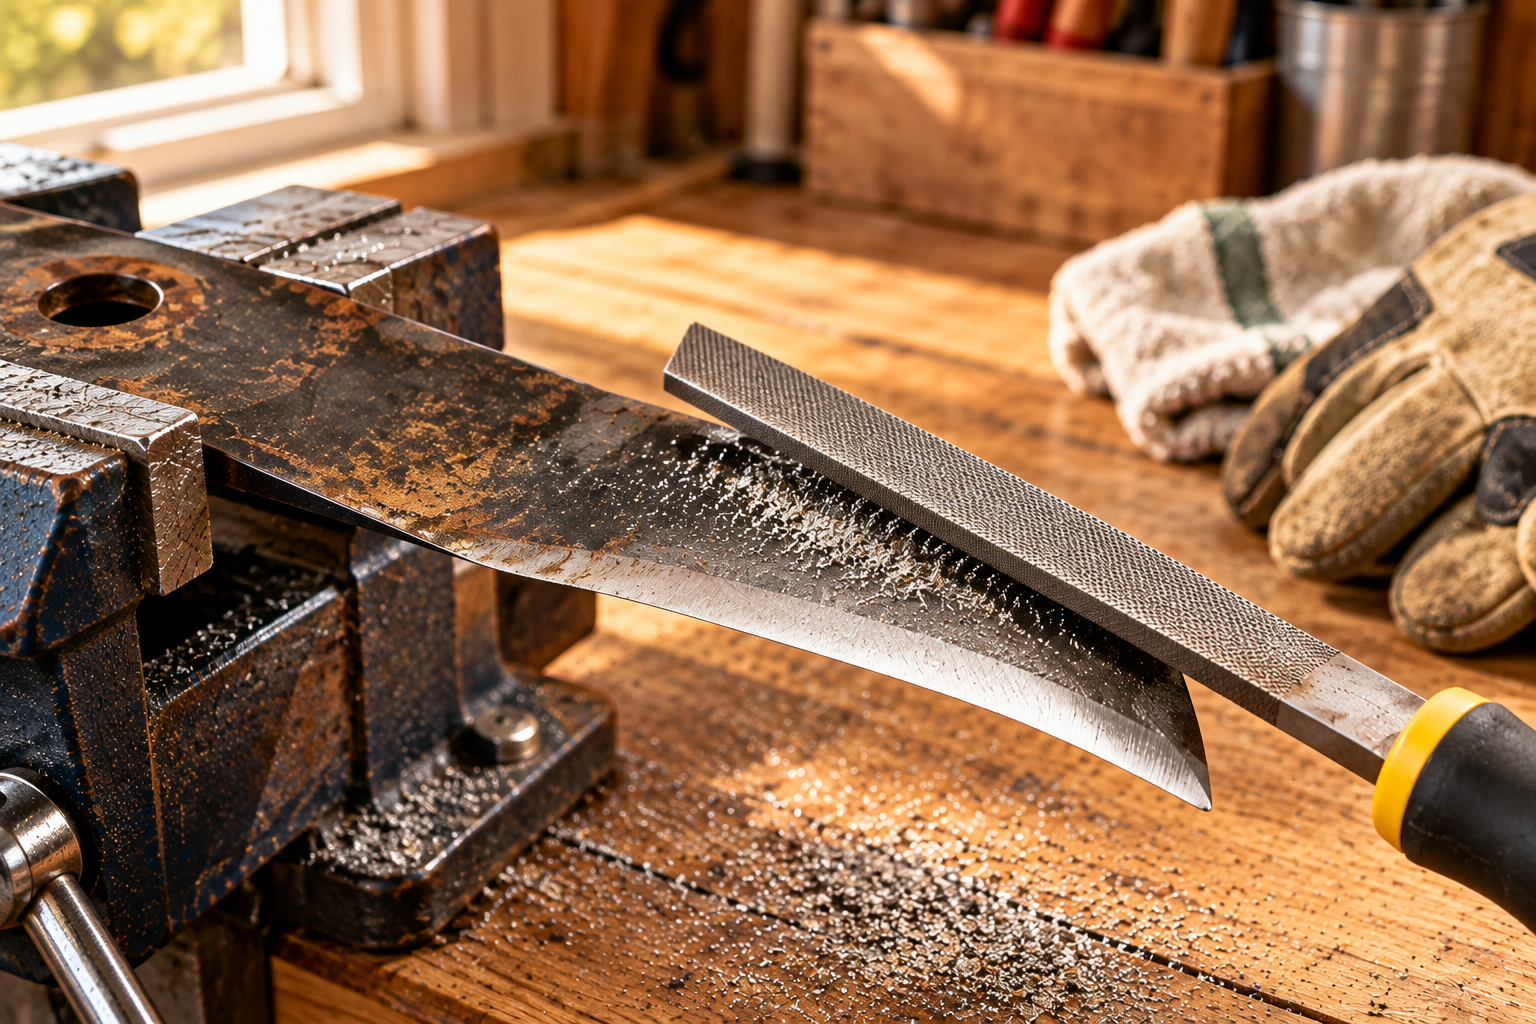
Sharpen both cutting edges evenly
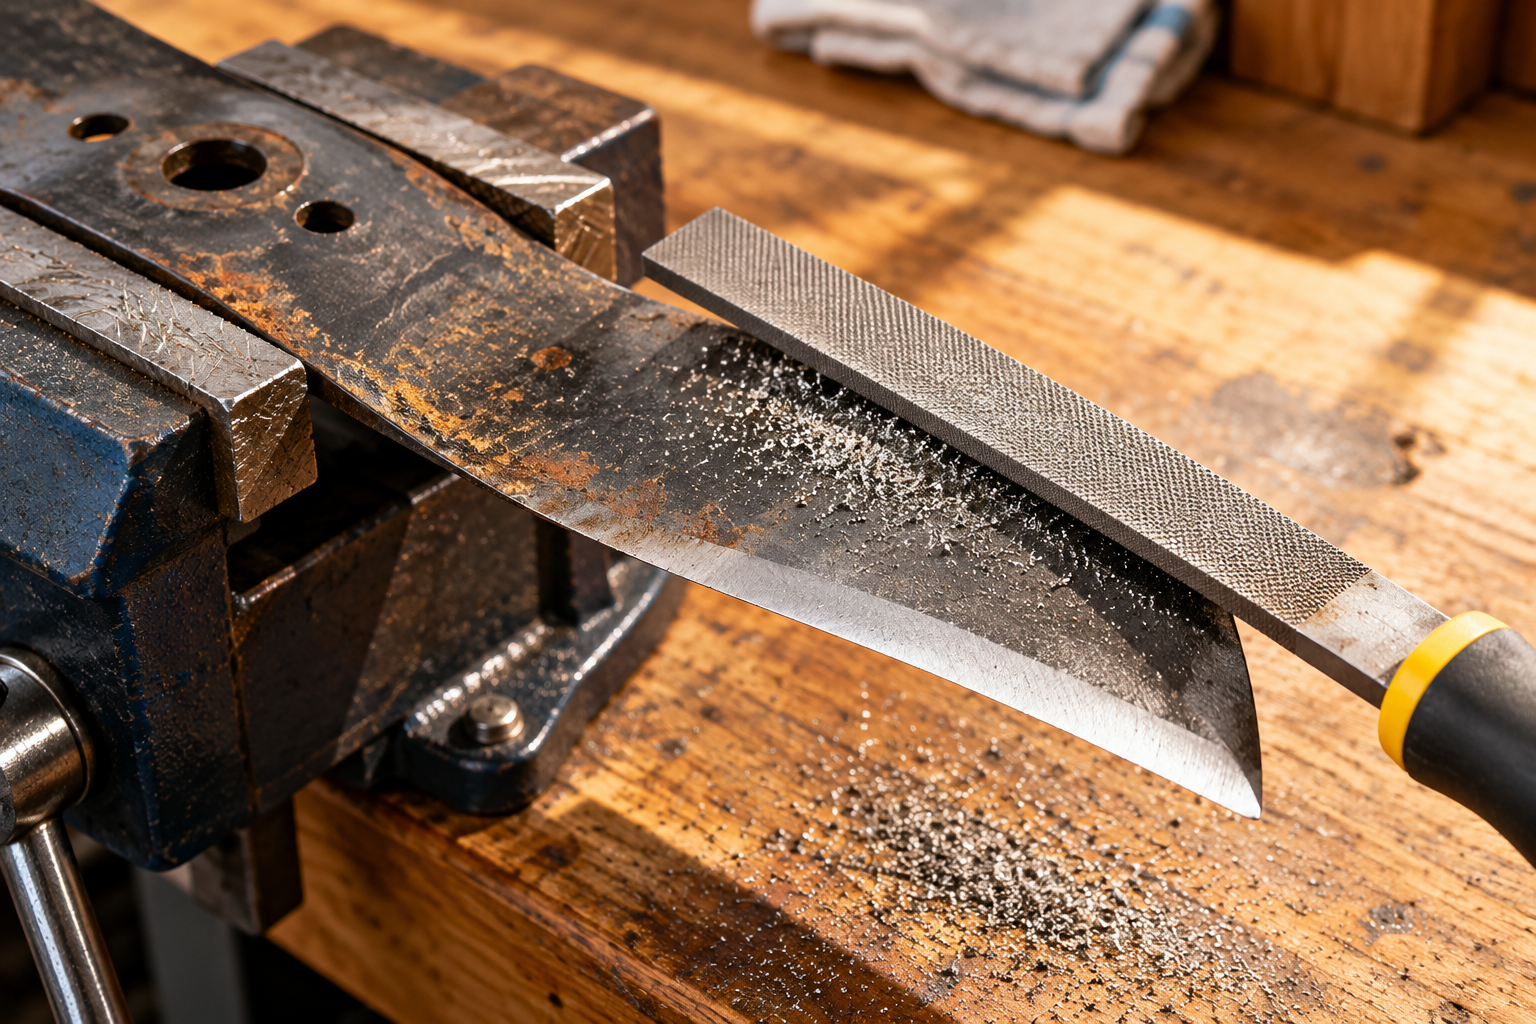
Clamp the blade in the vise. Push the file along the bevel in one direction, removing only enough metal to restore each cutting edge, and stop when you have a clean, bright edge. Let the balancer in the next step, not a stroke count, tell you whether more needs to come off one end. If you use a grinder, take light passes so the steel doesn’t discolour from heat.
A mower blade should not be razor sharp. Home Depot’s guide notes that a razor-sharp blade dulls more quickly, and that a gently sharpened, shiny edge is the goal.
Balance the blade
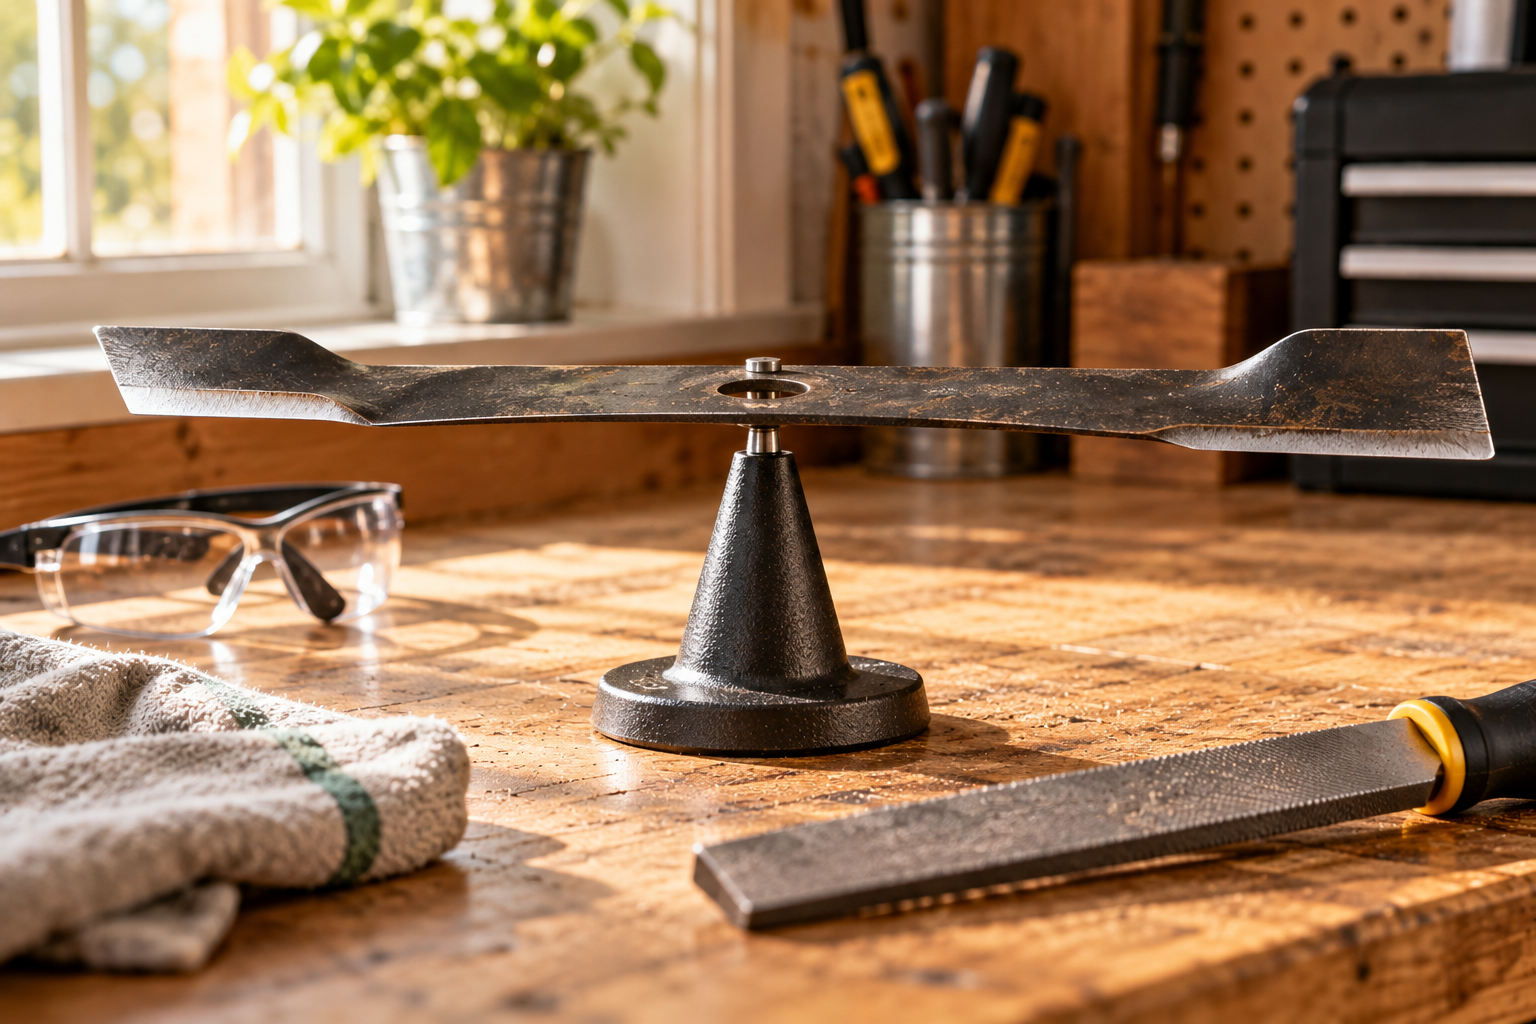
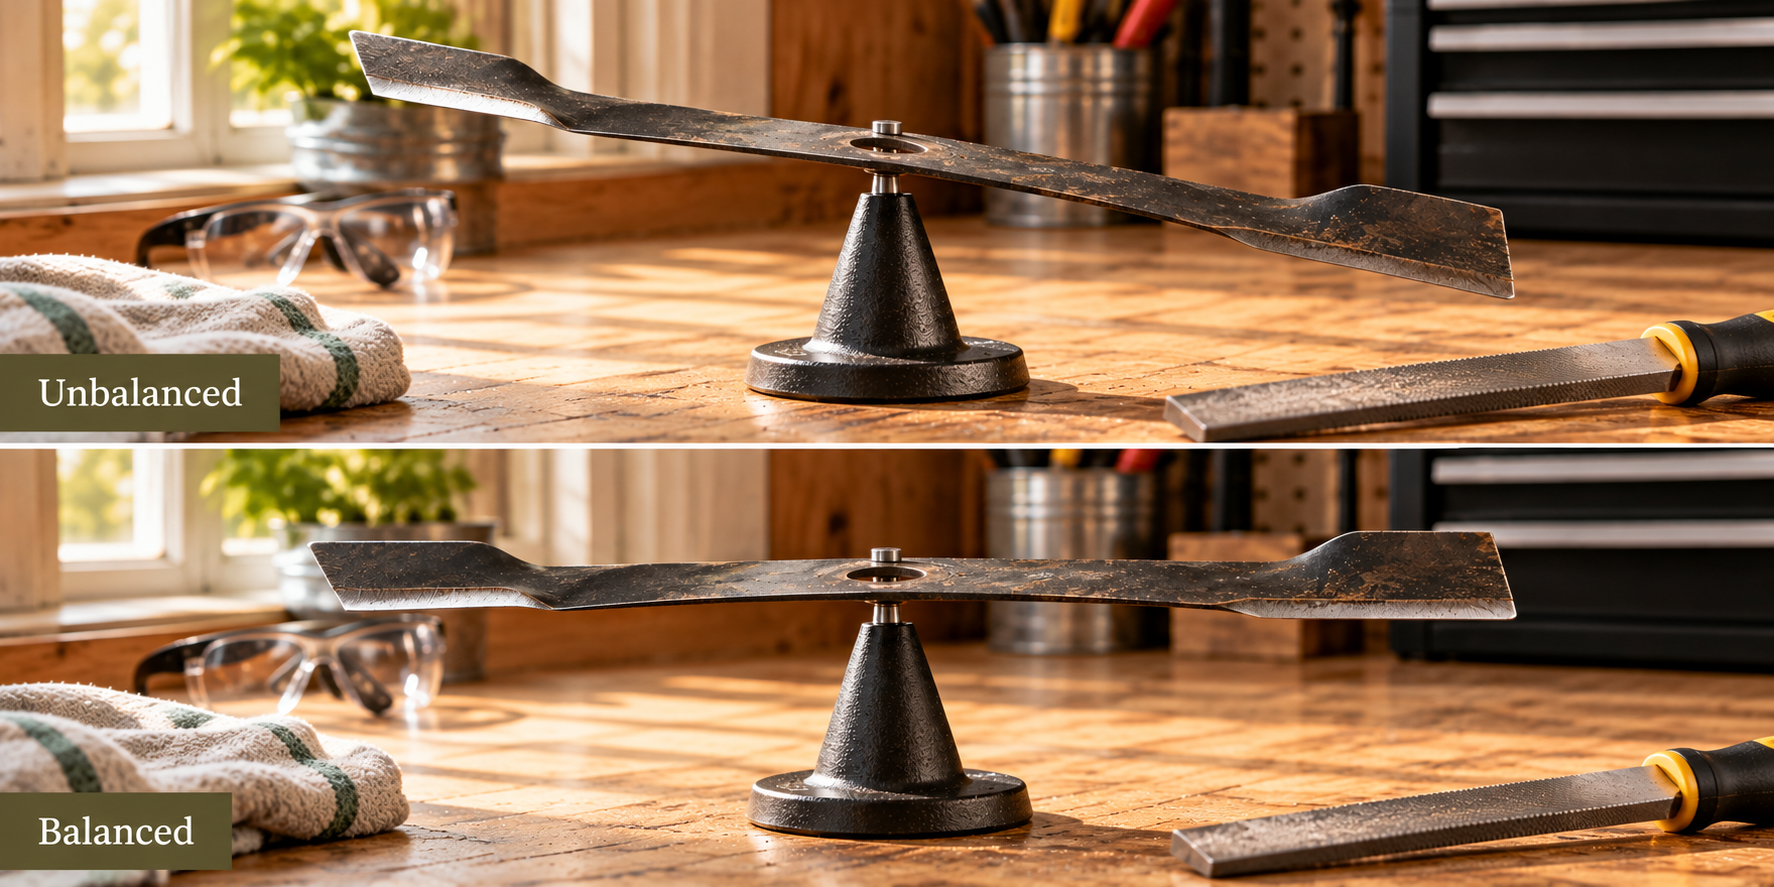
What is blade balancing? It’s checking that both ends of the blade weigh the same, so it spins without wobbling. Sharpening removes metal, and if more comes off one end than the other, the blade is out of balance. Home Depot Canada flags this directly, and CCOHS’s point about vibration is why it matters.
- Rest the blade’s
- hole on a purpose-built balancer.
- Let it settle and see whether one end drops.
- Remove a little metal from the cutting edge of the heavy end.
- Retest, and repeat until it sits level.
Take metal from the sharpened edge, not the back or the tips. A purpose-built blade balancer is inexpensive and makes it easy to see which end is heavier.
Reinstall the blade correctly
Put the blade back with the orientation you marked, using the original hardware in its original order, and tighten the bolt to the torque in your operator’s manual. Don’t use a number you found online, because torque varies by model. CCOHS also says to check mounting bolts frequently. Reconnect the spark plug wire or battery only after everything is finished.
Complete the End-of-Season Lawn Mower Tune-Up
The blade is the centrepiece, but not the whole job. What comes next depends on how your mower is powered, and on what the manual says.
For gas lawn mowers
- Inspect the air filter and the spark plug, and replace them if your manual’s schedule says so.
- Handle the oil as the manual directs. Many call for fresh oil before long storage (Cub Cadet Canada and Briggs & Stratton both mention it).
- Follow the fuel procedure for your engine. Briggs & Stratton advises treated fuel in a full tank. Other engine makers have you run the tank dry or drain it. Don’t mix the methods.
- Check cables, controls, wheels, loose fasteners, visible leaks and rust.
For battery-powered lawn mowers
- Remove the battery before cleaning or storing the mower.
- Inspect the battery and charger for damage.
- Charge it to the level your manufacturer specifies. These instructions differ: Toro’s operator’s manual for one robotic model says to fully charge it, while other makers, such as Mammotion in its Canadian robot-mower guide, recommend a partial charge.
- Stay inside the battery’s stated storage temperature range. That same Toro manual lists 0 to 23°C and under 65% relative humidity as an example, which is why I won’t offer a universal number.
| TaskGas mowerBattery mower |
|---|
| Disconnect powerSpark plug wire (and key)Battery (and safety key) |
| Fuel treatmentYes, per the engine manualNone |
| Engine oilPer the manualNo engine oil |
| Air filter and spark plugTypically inspectedNot applicable |
| BladeInspect, sharpen or replace, balanceInspect, sharpen or replace, balance |
| Battery storageStarting battery, if equippedMain lithium-ion battery, per manufacturer |
| Deck cleaningYesYes |
These are the numbers and procedures I won’t hand you from a blog post:
- Blade bolt torque
- Which way to tip the mower
- Blade orientation and washer arrangement
- Fuel-storage procedure
- Oil type and quantity
- Battery charge level and temperature range
Clean the Deck Before the Mower Goes Into Storage
Wet grass clippings hold moisture against bare metal all winter, and a layer of dirt can hide the corrosion underneath. Finish any leaf mulching first, since chewing through sticks and stones is what nicks a blade in the first place (our guide to mulching leaves and fall cleanup covers that job). Then, with the power disconnected, scrape the underside of the deck, clear the discharge chute, and wipe down the top. Use water only as your manufacturer permits, and let the mower dry completely, because a damp deck is worse than a dirty one. Look for bare metal, and treat it if your manual allows.

How to Store a Lawn Mower Through a Canadian Winter
Choose a dry storage location
A garage or shed is usually fine, as long as it is dry. For the mower body, keeping the machine clean and dry matters most, so avoid damp corners and keep it clear of snow and ice and out of children’s reach. Batteries and some other components have their own temperature limits, so follow the manufacturer’s storage requirements. While you’re organizing the space, our guide to organizing your garage for winter and our walkthrough on storing garden tools before winter cover the rest of what lives out there.
Keep it away from de-icing salt and chemicals
This is the Canadian detail most guides skip. Garages collect road salt, and a mower parked beside a bag of de-icing salt or garden fertilizer is sitting in a corrosive environment. The Toro manual linked above says to keep a mower away from garden chemicals and de-icing salts, and Cub Cadet Canada adds that you should avoid fertilizer and anything with a pilot light or open flame, such as a furnace or water heater.
Gas-mower and fuel safety in garages and sheds
Never run a gas mower inside a garage or shed, even for a minute during winterization. Health Canada says to never run gas-powered equipment in either, and to keep the door between your house and an attached garage closed. If you store fuel, CCOHS says to keep it in a cool, dry, well-ventilated spot out of direct sunlight, away from heat and ignition sources, and separate from work areas. While you’re in winter mode, the same weekend is a sensible time to winterize your sprinkler system and sort out patio furniture storage.
Never run the mower there. Health Canada’s attached-garage factsheet says homes with attached garages may have higher levels of benzene and other volatile organic compounds, coming from vehicles and from stored items such as lawnmowers and fuels, and that these can enter the home through doors or cracks in the wall. Where practical, a detached shed is the lower-exposure place for a gas mower and its fuel. That last point is my inference from the factsheet, not a Health Canada instruction.
Should You Sharpen the Blade Yourself or Pay a Professional?
Either is reasonable. Ask any shop whether a quote covers blade sharpening only or a full tune-up, because they are different jobs. Prices vary by city and by machine, so I haven’t quoted any here. CCOHS also recommends an annual inspection by an experienced technician, which is a good habit whichever way you go.
| DIY makes sense whenProfessional help makes sense when |
|---|
| The blade is simply dullThe blade bolt is seized |
| Nicks are minorYou suspect a bent engine shaft |
| You have the tools and the manualThe mower vibrates severely |
| You’re comfortable removing the bladeThe damage is heavy |
| The blade balances normallyThe blade won’t balance |
Common Lawn Mower Blade Sharpening Mistakes
- Forgetting to disconnect the power source.
- Sharpening a cracked or bent blade instead of replacing it.
- Grinding a razor edge.
- Changing the original bevel.
- Removing too much metal.
- Overheating the blade with a grinder.
- Skipping the balance check.
- Reinstalling the blade upside down.
- Guessing the bolt torque.
- Storing the mower while it’s still damp.
- Applying one generic winterization recipe to every mower.
End-of-Season Lawn Mower Storage Checklist
- Final mow finished and leaf mulching done
- Power source disconnected
- Deck cleaned and dried
- Blade inspected
- Blade sharpened or replaced
- Blade balanced
- Blade reinstalled the right way up, to the manual’s torque
- Gas or battery maintenance done per the manual
- Filter, spark plug and oil handled where they apply
- Battery stored per the manufacturer’s instructions
- Mower and storage area dry
- Mower kept away from salt, fertilizer and other chemicals
- A note left for spring: what you did, and what to check
What to Check Again in Spring
Before the first mow, give the mower a quick look: blade security, tires, controls, and the battery or fuel according to the manual. Start a gas mower outside, never in the garage. Then listen and feel for any vibration through the handle, and stop if something feels wrong.
A mower prepared this way takes an afternoon, and the payoff arrives months later: in April the machine starts, cuts cleanly and doesn’t rattle your hands. Most of what goes wrong with a stored mower was decided in the garage the day it went in.
Sources and editorial note
Guidance here was checked against the sources linked in the article, including CCOHS, Health Canada and manufacturer documentation, as of October 7, 2026. Procedures vary by model, so consult your operator’s manual before servicing your mower. This article is general information, not a substitute for the manufacturer’s instructions.